The information in this article applies to:

QUESTION
I found a material in Chief Architect's library that I want to modify. How can I make a customized library material that I can use in future plans?

ANSWER
Much like objects, materials in Chief Architect can be edited so that they better suit your design needs.
The Adjust Material Definition tool is useful for quickly changing plan materials directly from a 3D view, however, changing a materials definition with this tool affects all objects in the current plan that are using that material. It does not affect any materials saved in the library or materials used in other plans, though, so it's not useful if you want to be able to edit the material on just a single object, or reuse the altered material in the future.
If you wish to customize a material that you see in the Library Browser, and make those changes available for use in other plans or for exporting, begin by creating a copy of the material and then modify it as needed.
To create a copy of a library material
- Select View> Library Browser
 to display the Library Browser if it's not already displayed, then browse to the material that you would like to customize.
For the purposes of this example, the Black Beehive Tile material is used, which can be found in the Materials Tile - The Harris Collection Bonus catalog.
- Right-click on the material and choose Copy to User Catalog from the contextual menu.
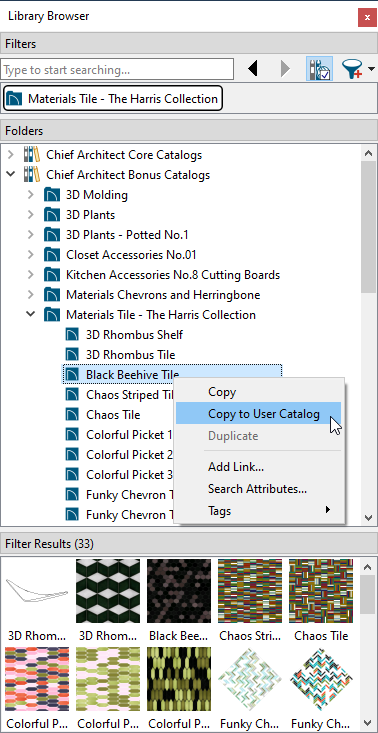
Notice that the copied material is now located in the User Catalog folder, retains the same material name as the original, and is ready to be modified.
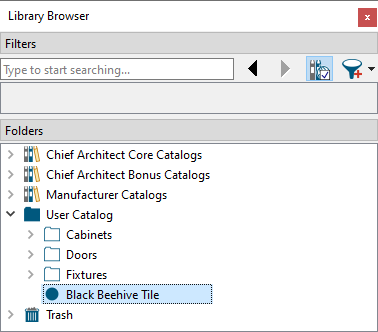
You can also right-click on your User Catalog and select New> Material to create a new material from an image file saved on your computer and edit it in the same manner as described in this article. For more information, please see the "Creating a New Material" resource in the Related Articles section below.
To customize a material
- Right-click on the newly pasted material and select Open Object
 to display the Define Material dialog.
- Select the Pattern panel.
Type a descriptive name for the custom material. This name will display in the Library Browser. For the purposes of this example, we will call the new material: Black Beehive Tile Custom.
Materials have two attributes that determine what they look like in 3D views: patterns and textures. The Pattern panel addresses how patterns display. Patterns are composed of CAD lines and are used to represent materials in 3D views using the Vector View, Technical Illustration, and Hand Drawn Lines rendering techniques.
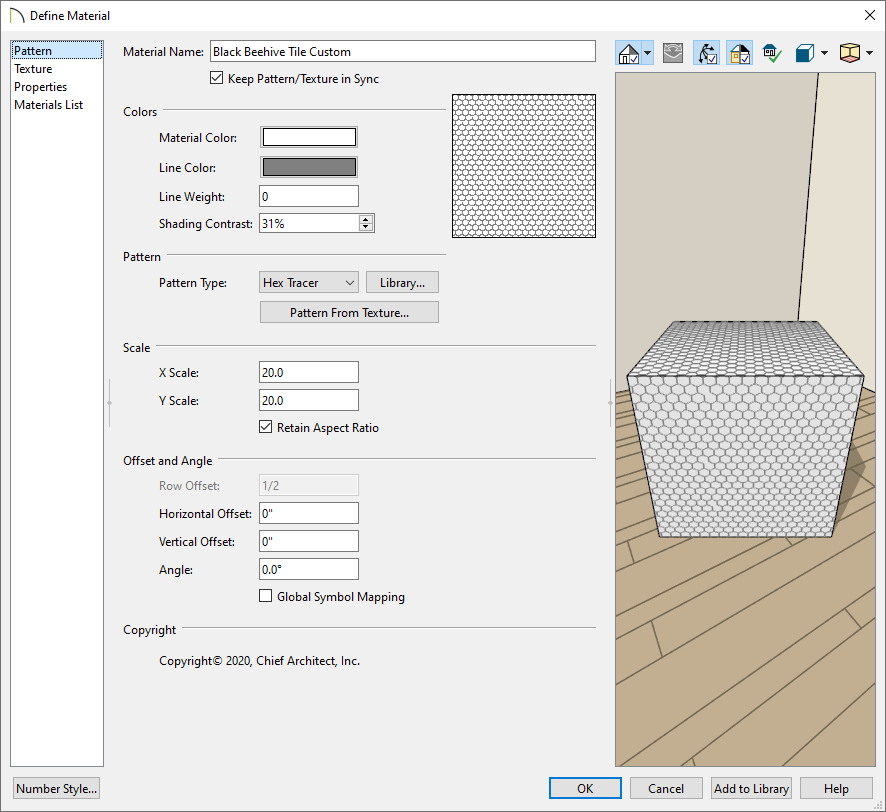
- You can change the 3D preview properties located in the top right corner. You can choose to see a 3D preview of the material in color or in black and white, change the rendering technique, select the preview shape, and more.
- Specify the Color properties of the pattern, the Pattern Type or style, the Scale or size (Width and Height), along with the Offset and Angle of the pattern.
Check the Keep Pattern/Texture in Sync option to maintain consistent Scale and Offset and Angle settings between the pattern and texture if these settings are modified. You can also specify a custom pattern to be used from the Library, or generate a pattern based upon a texture image by selecting the Pattern From Texture option.
In this example, the Line Color has been changed from the default black to a gray color.
- Once a change has been made, select the Tab key on your keyboard to update the dialog without exiting. This will allow you to see changes as they are made in real-time.
- To learn more about these various settings, click on the Help button at the bottom of the dialog.
- Select the Texture panel.
The Texture panel determines how textures are displayed. Textures are based off of image files and are used to represent materials in 3D views using the Standard, Physically Based, Clay, Watercolor, and Duotone rendering techniques, as well as for Ray Trace renderings.
If the 3D preview on the right of the dialog is displaying a Vector View rendering technique, switch this to use the Physically Based or Standard option.
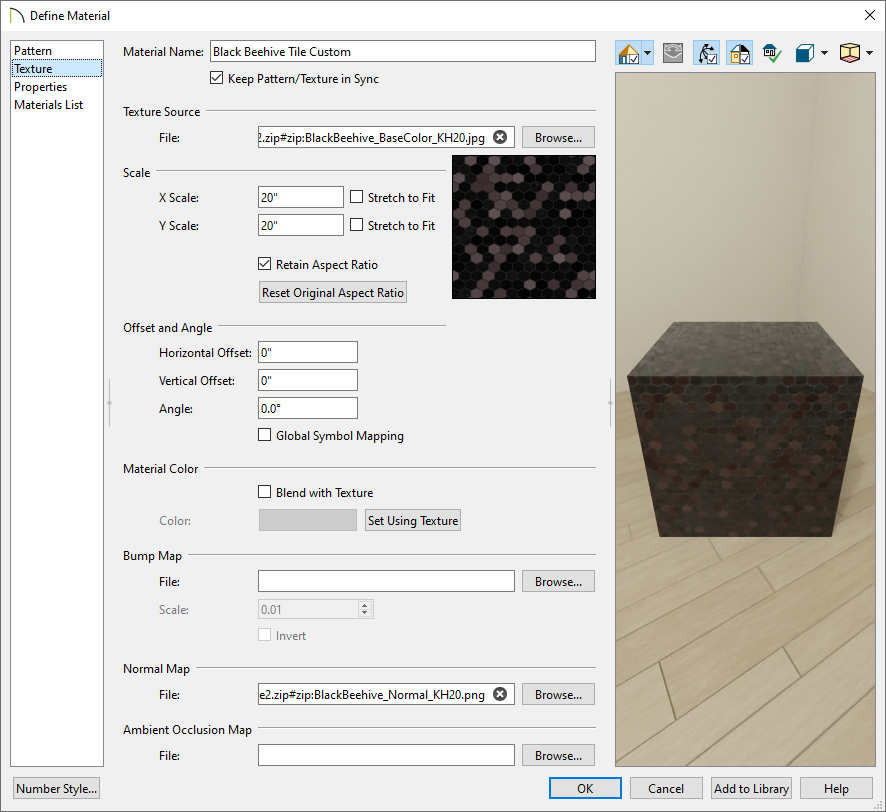
- Notice that the Texture Source is referencing an image file demonstrated by the .jpg file extension.
- Specify the Scale or size (Height and Width) of the texture, along with the Offset and Angle.
Check the Keep Pattern/Texture in Sync option to maintain consistent Scale and Offset and Angle settings between the pattern and texture if these settings are modified.
In this example, no changes are made to the texture.
- You can check the Blend with Texture box to blend the texture with a solid color, then click the Color box to specify the color you want to blend it with.
A Set Using Texture button is also available that allows you to use the predominant color of the texture.
- Material Maps can also be created and specified for textures. These are specifically produced image files that can add realism to a material's appearance in rendered and ray trace views by making it appear contoured instead of flat, or rough instead of smooth or glossy.
- To learn more about these various settings, click on the Help button at the bottom of the dialog.
- Select the Properties panel.
The settings here control how the material appears in most rendered and ray traced 3D views. Prior to making adjustments to material properties, it's recommended that you're using either the Physically Based or Show CPU Ray Trace View 3D preview option. This will show you in real-time, what these material changes will look like in a realistic rendering.
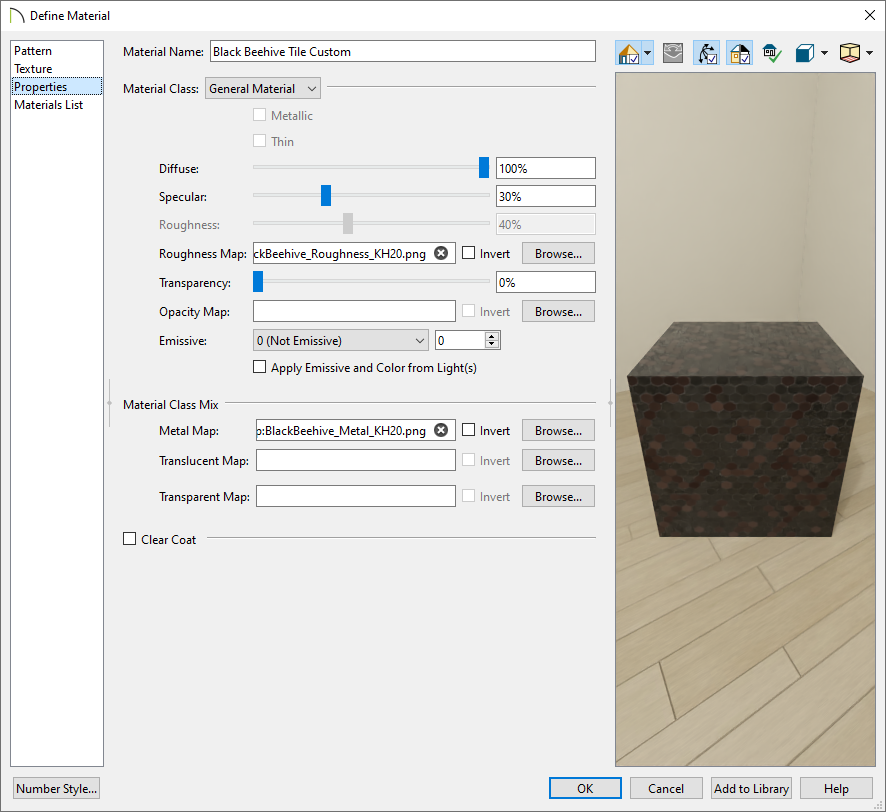
- You may notice that each material falls into a particular class. Feel free to change the materials class and experiment with the different settings related to each.
In this example, the material being used is categorized into the General Material Material Class.
- Additional Material Maps can be added here as well.
- Again, if you'd like to learn more information about these various properties or settings, click on the Help button at the bottom of the dialog.
- On the Materials List panel, specify the properties to be used for calculation purposes when generating a materials list.
- If the selected material was copied from a manufacturer specific library, contact information for the manufacturer will be displayed on the Manufacturer panel.
- Once you have completed making changes to the material, click OK. You are now ready to use your customized material in your plans.
You can repeat this process to create as many copies of the materials that you need in different colors, rotations, scales, reflectivity, with various origins, etc.
If you have already modified a library material in a given plan, and did not first create a copy of it, you can still add it your User Catalog for future use by following the steps below.
To save an already modified material to the library
- Create a 3D camera view looking at an object that is using a modified material, click the Select Objects
 tool, then click on the object to select it.
Alternatively, if you recall the name of the material you modified, you can navigate to 3D> Materials> Plan Materials  and skip to Step 3 below.
- Click the Open Object
 edit button to open the object's Specification dialog and navigate to the location where the material is specified.
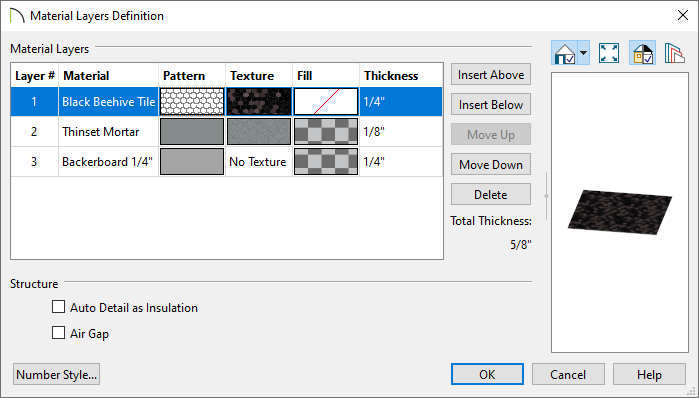
- Click on the Material column or the Select Material button, if available.
- In the Select Material dialog that opens, select the Plan Materials panel.
- Confirm that your modified material is highlighted in this list; or instead, select the customized material you would like to add, then click the Add to Library button on the right side of the dialog.
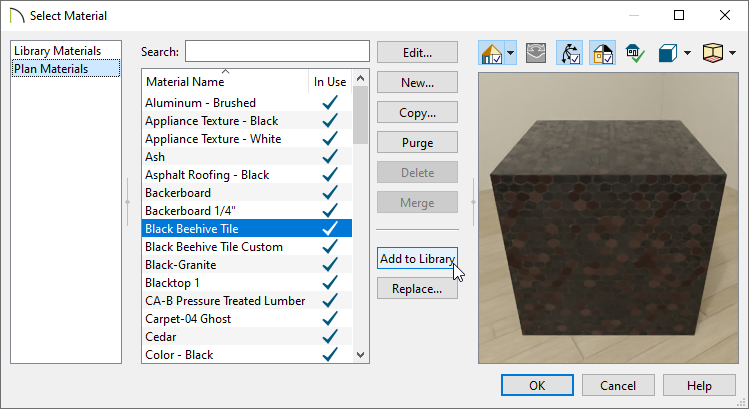
- Click OK on each dialog, then access the User Catalog folder within the Library Browser. You can now right-click on the newly added material, select Rename, and specify a name of your choice.


 to display the Library Browser if it's not already displayed, then browse to the material that you would like to customize.


 tool, then click on the object to select it.
 edit button to open the object's Specification dialog and navigate to the location where the material is specified.
