The information in this article applies to:

QUESTION
How do I specify cable or glass panels on my railings and stairs?

ANSWER
Cable, glass, and other decorative panels can be applied to railings and stairs using the Staircase Specification and Railing Specification dialogs.
To specify panels in the Staircase Specification dialog
- Using the Select Objects
 tool, select the Staircase that needs changing, then click on the Open Object
  edit tool.
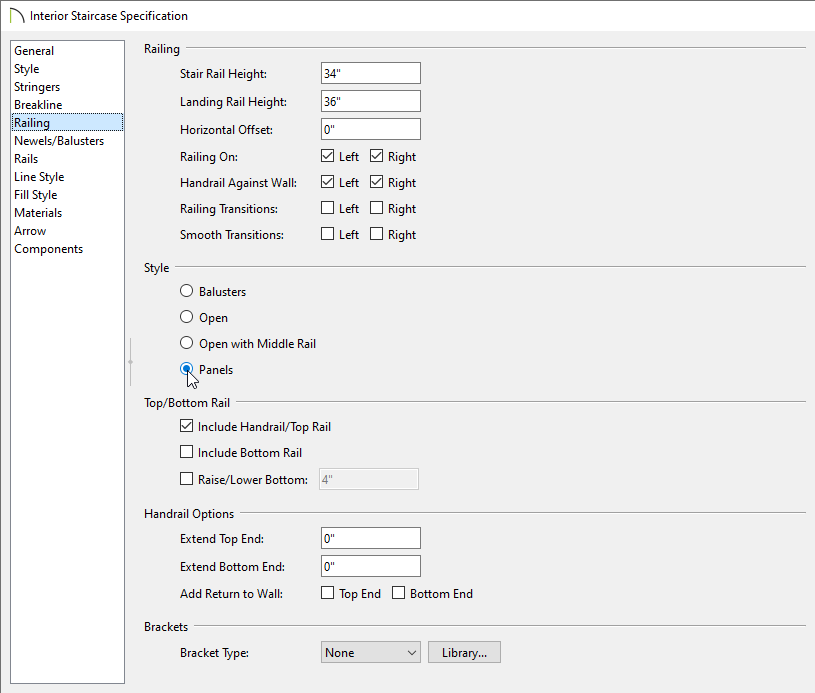
- On the Railing panel of the Staircase Specification dialog that displays, select Panels under the Style section.
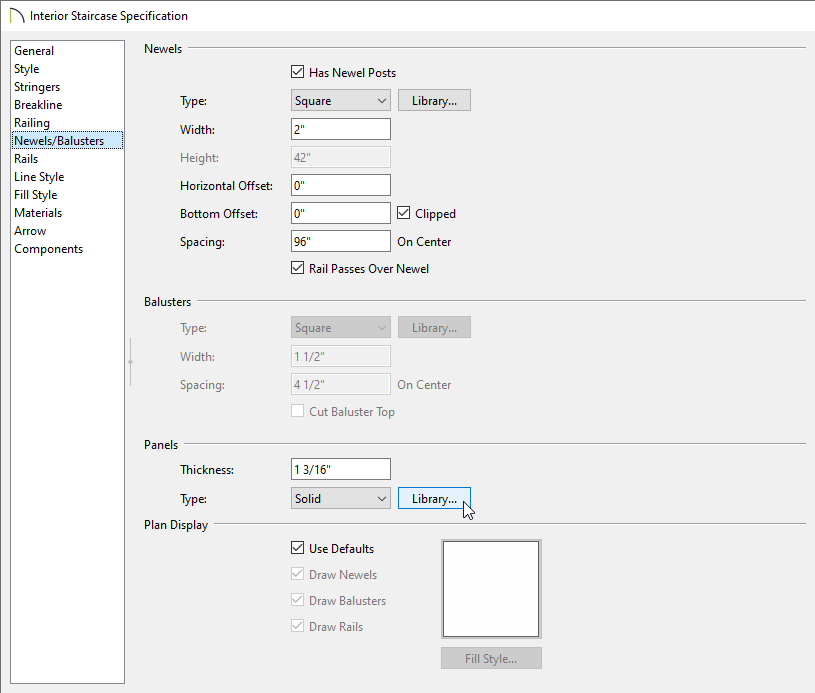
- On the Newels/Balusters panel, click the Library button located under the Panels section to open the Select Library Object dialog and browse the library for an appropriate panel option.
- Cable railing panels can be found in Chief Architect Core Catalogs> Architectural> Fences and Railings> Cable.
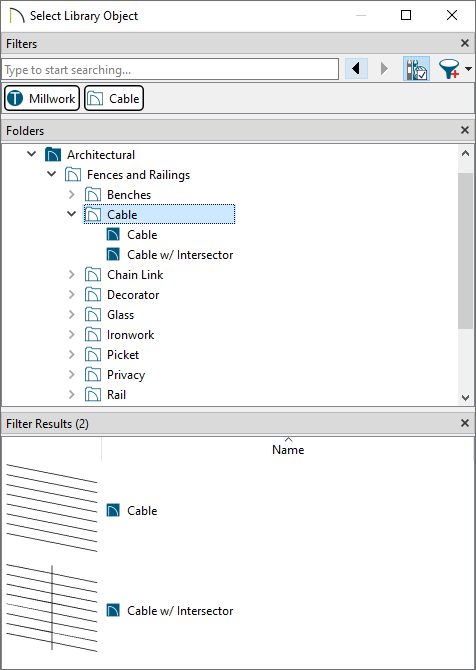
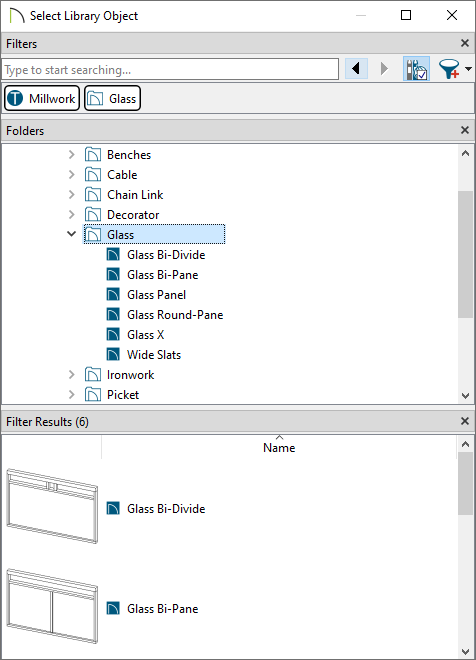
- Glass panels can be found in Chief Architect Core Catalogs> Architectural> Fences and Railings> Glass.
- Once an appropriate panel has been selected, and all other desired changes have been made, click OK.
To specify panels in the Railing Specification dialog
- Using the Select Objects
 tool, select the railing that needs changing, then click on the Open Object
  edit tool.
If the majority of railings in your plan are going to be cable or panel railings, it would be more efficient to apply the steps mentioned in this section to your Railing Defaults. From the menu, click Edit> Default Settings and expand the list for Walls to edit the Railing defaults.
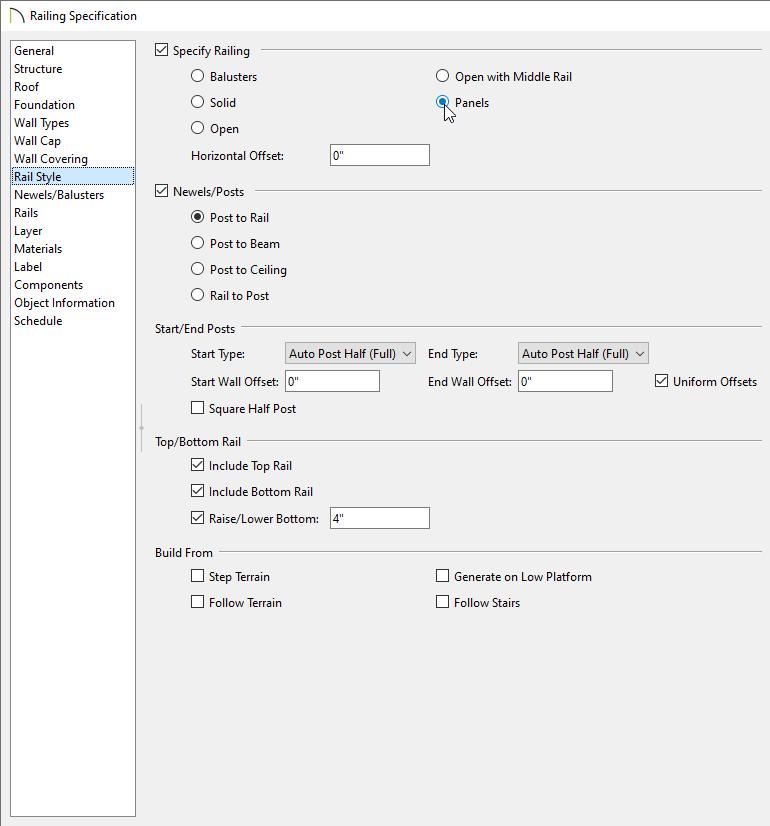
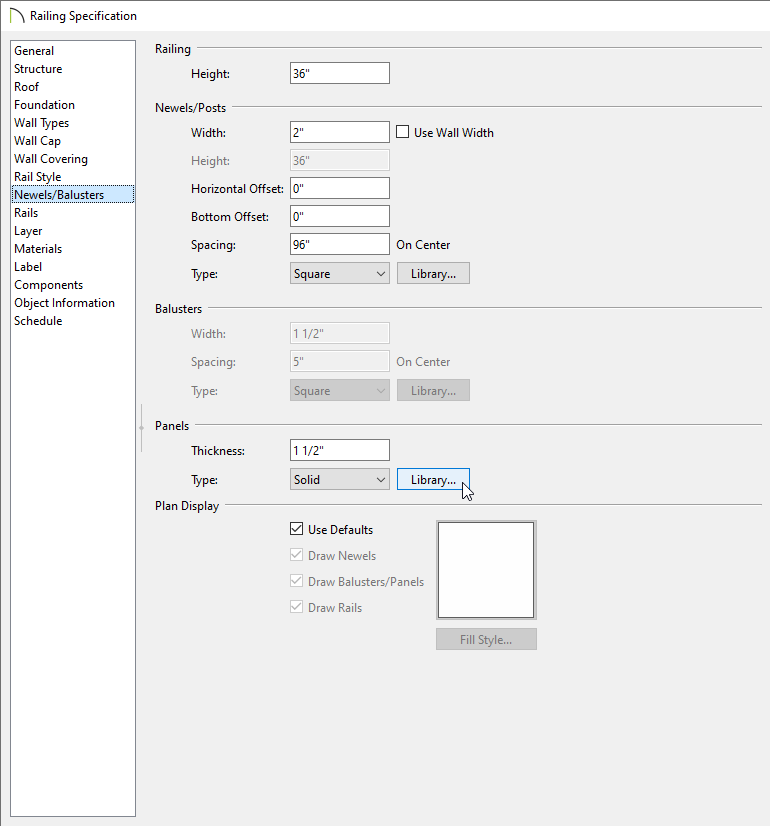
- On the Rail Style panel of the Railing Specification dialog that displays, select Panels.
- On the Newels/Balusters panel, click the Library button located under the Panels section to open the Select Library Object dialog and browse the library for an appropriate panel option.
- Cable railing panels can be found in Chief Architect Core Catalogs> Architectural> Fences and Railings> Cable.
- Glass panels can be found in Chief Architect Core Catalogs> Architectural> Fences and Railings> Glass.
- Once an appropriate panel has been selected, and all other desired changes have been made, click OK.


