The information in this article applies to:

QUESTION
I am designing a kitchen for a client with a disability and would like to know how I can create kitchen cabinets that meet his needs. How can I do this?

ANSWER
There are a number of ways to customize cabinets so that they meet the needs of individual clients.
The steps in this article will teach you how to design your own accessibility cabinets; however, you can also download and install the Accessible Design bonus catalog from the Chief Architect 3D Library. This catalog is available for free for all users.
To create base cabinets that accommodate wheelchairs
-
Open
 the plan file in which you would like to design barrier-free cabinetry.
- Select Edit> Default Settings
 from the menu. In the Default Settings dialog, click the arrow
  beside Cabinets, select Base Cabinet and click the Edit button.
- On the General panel of the Base Cabinet Defaults dialog:
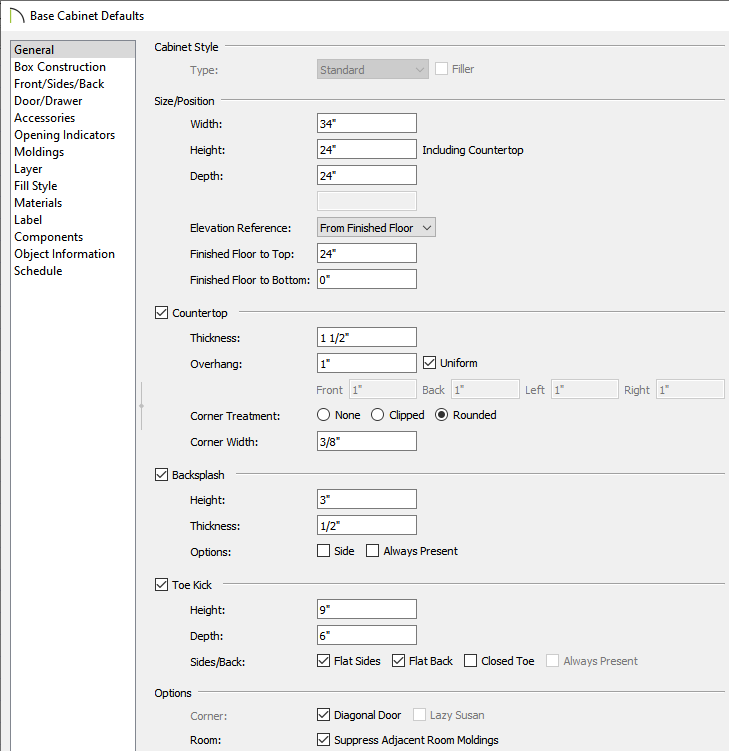
- Specify the desired Height including the countertop. In this example, 34" is used.
- Specify the Toe Kick Height and Depth. In this example, 9" and 6", respectively, are used.
- Click OK to close the dialog and apply your changes; then, click Done to close the Default Settings dialog.
- Select Build> Cabinet> Base Cabinet
 from the menu, then click in your plan to place a base cabinet with your modifications at that location.
To create base cabinets with accessible storage
- Select Edit> Default Settings
 from the menu. In the Default Settings dialog, click the arrow
  beside Cabinets, select Base Cabinet and click the Edit button.
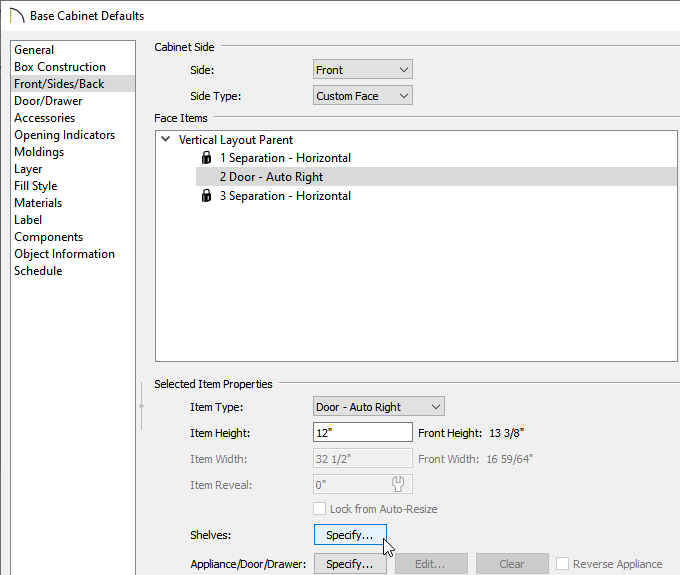
- On the Front/Sides/Back panel of the Base Cabinet Defaults dialog, click on the drawer in the preview image, then click the Delete button.
- Next, click on the door in the preview image to select it or select the Item Number drop down list and pick the number that correlates with the Auto Right Door.
- Click the Specify Shelves button.
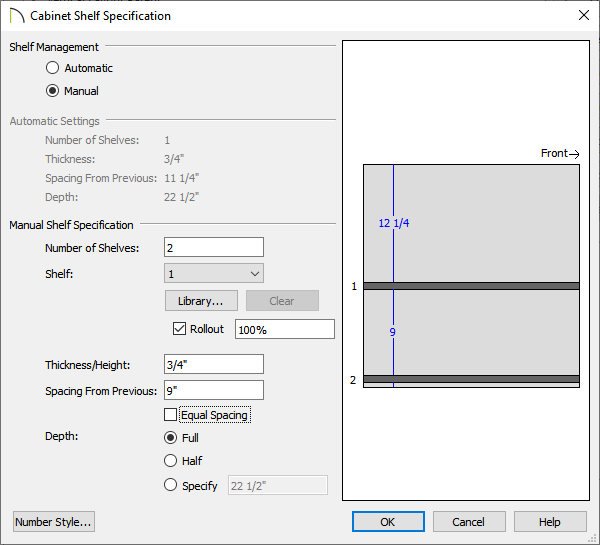
- In the Cabinet Shelf Specification dialog, which opens next, click the radio button beside Manual to enable the options below it.
- Uncheck Equal Spacing, then specify the desired Number of Shelves. In this example, 2 shelves are used.
- Select 1 from the Shelf drop-down list, then:
![]()
![]()
- Select Rollout from the Type drop-down list.
- Specify the Spacing From Previous as 9". In the case of Shelf 1, which is the top shelf, this value is the distance from the bottom of the shelf to the top surface of the second shelf.
- Press the Tab key on your keyboard to update the preview image on the right.
- Select 2 from the Shelf drop-down list, then:
![]()
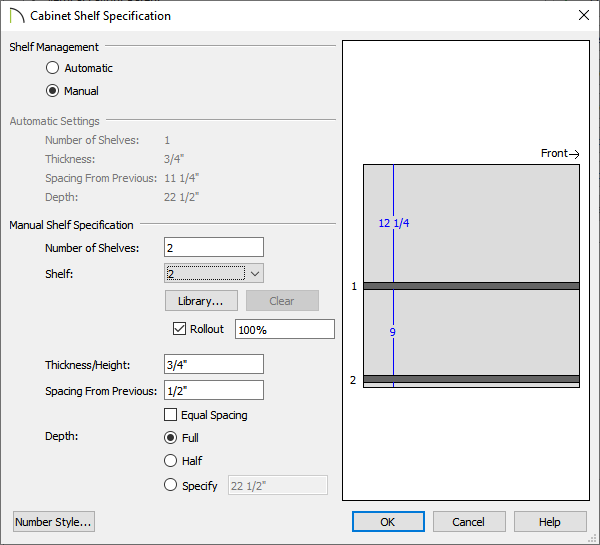
- When you are satisfied with your shelves, click OK to close the Cabinet Shelf Specification dialog, then click OK once more to close the Base Cabinet Defaults dialog. Finally, click Done to close the Default Settings dialog.
- Select Build> Cabinet> Base Cabinet
 from the menu, then click in your plan to place a base cabinet with these additional modifications in your plan.
To create a barrier-free sink or cooktop base
- Select a base cabinet that you would like to use as a sink base and click the Open Object
 edit button.
- On the General panel of the Base Cabinet Specification dialog:
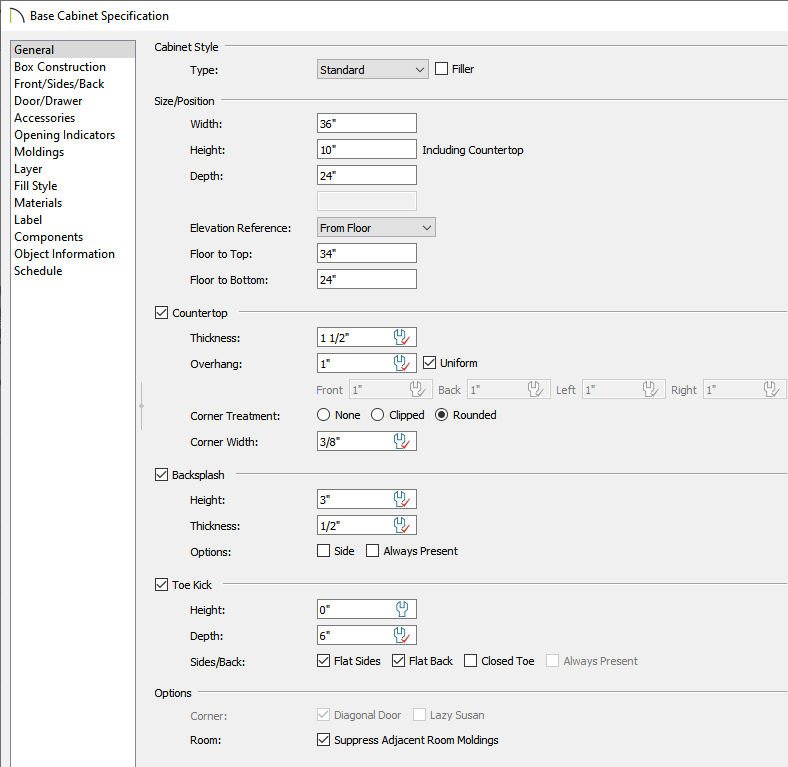
- Specify a Width sufficient to hold the sink that you wish to use. In this example, 36" is used.
- Specify the Height of the cabinet, measured from the bottom to the top. In this example, 10" is used.
- Specify the desired Floor to Bottom distance, measured from the bottom of the cabinet down to the floor. This value should be enough to accommodate a wheelchair user's knees. In this example, 24" is used.
- On the Front/Sides/Back panel, click on the cabinet drawer in the preview image or select the Item Number drop down list and pick the number that correlates with the Drawer.
- Select Drawer - False from the Item Type drop-down list.
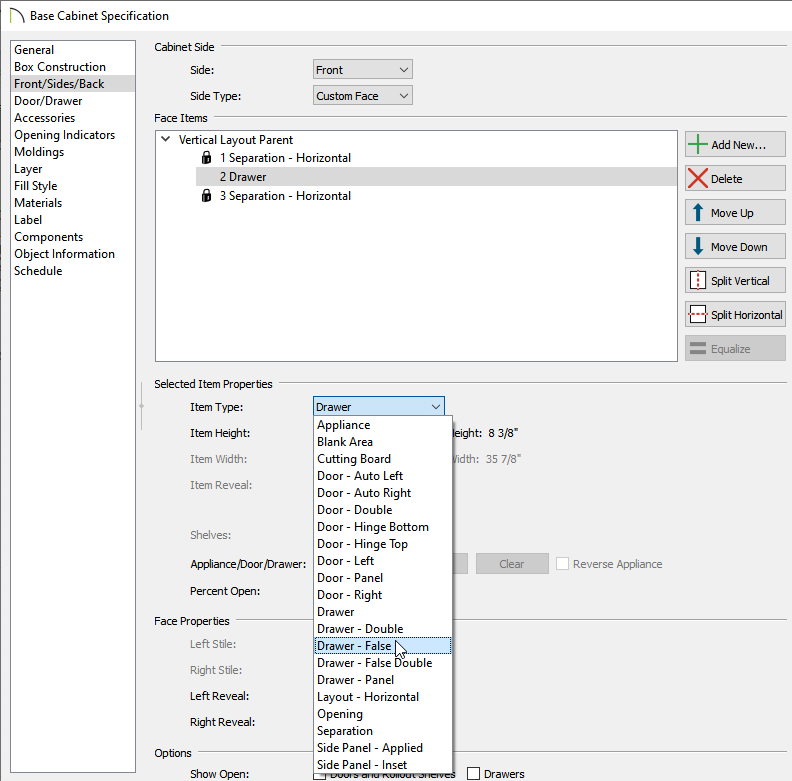
- If there's a face item defined as a toe kick, click on it in the preview pane or within the Item Number drop down to select it, and hit the Delete button.
- Adjust the Item Height of your False Drawer if necessary.
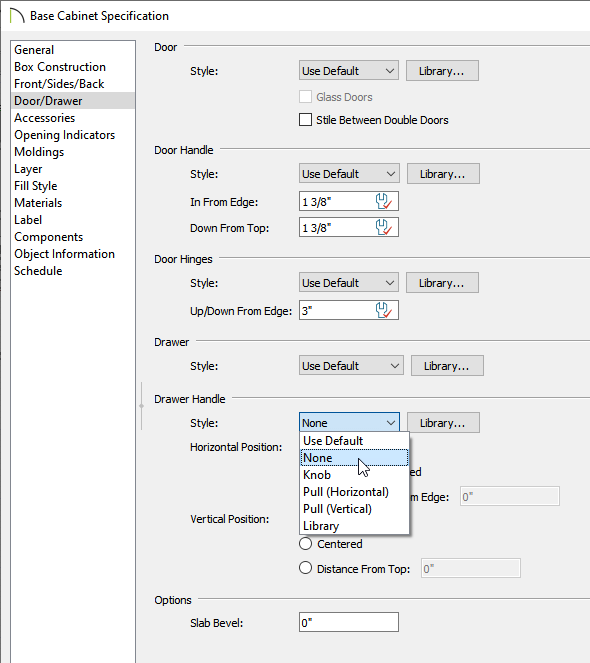
- On the Door/Drawer panel, select None from the Drawer Handle drop-down list, then click OK.
- Select View> Library Browser
 from the menu, then browse to Architectural> Fixtures> Sinks> Kitchen Sinks> Without Fixtures and click on a kitchen sink to select it.
- In this example, the Flush Mount Offset 32" sink is used.
- Alternatively, you can browse to Architectural> Appliances> Cooktops & Rangetops.
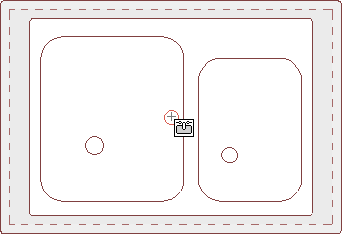
- When you move your cursor into the drawing area, it displays a fixture icon
 .
.
- Click on the sink base to place the selected sink or cooktop in this cabinet.
![]()
- Next, browse to Architectural> Fixtures> Faucets> Kitchen Fixtures> Single Control and click on a faucet to select it. You can also find hot water taps in the Accessories subfolder.
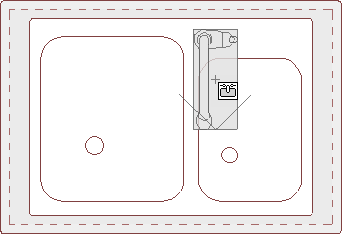
Single control fixtures such as levers are recommended in barrier-free designs because they do not require strong grips to use them.
- Move your cursor into the drawing area and click on the cabinet to place the faucet. Once placed, its position on the cabinet can be adjusted using its Move
 edit handle.


 the plan file in which you would like to design barrier-free cabinetry.
 from the menu. In the Default Settings dialog, click the arrow
  beside Cabinets, select Base Cabinet and click the Edit button.
 from the menu, then click in your plan to place a base cabinet with your modifications at that location.
 from the menu. In the Default Settings dialog, click the arrow
  beside Cabinets, select Base Cabinet and click the Edit button.


 from the menu, then click in your plan to place a base cabinet with these additional modifications in your plan.
 edit button.


 from the menu, then browse to Architectural> Fixtures> Sinks> Kitchen Sinks> Without Fixtures and click on a kitchen sink to select it.

 edit handle.