The information in this article applies to:

QUESTION
How do I change the type, quantity, thickness, spacing, depth, and material of the shelves inside of my cabinets?

ANSWER
Cabinet shelf attributes such as the quantity, depth, spacing, and thickness can all be controlled on the Front/Sides/Back panel located within the Cabinet Specification dialog.
To edit shelves located inside of cabinets
- Select Build> Cabinet
 , choose your desired Cabinet tool, then click in your plan to add a single cabinet.
In this example, a Full Height Cabinet is used.
- Using the Select Objects
 tool, click on the cabinet to select it, then click on the Open Object
  edit button.
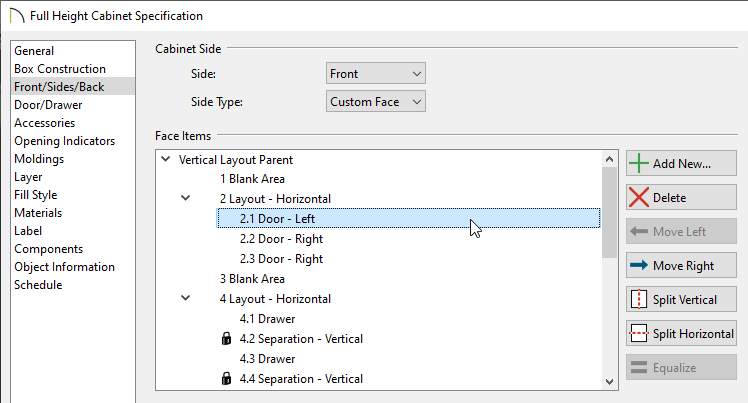
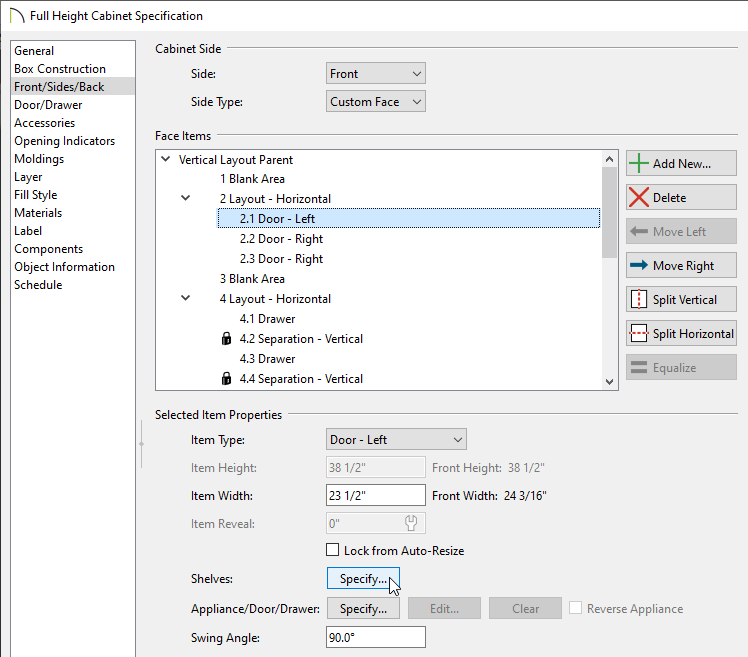
- On the Front/Sides/Back panel of the Cabinet Specification dialog that displays, use the Face Items table or the 3D preview on the right to select the face item that that you would like to adjust the shelves for.

- Click on the Specify button next to Shelves.

In X14 and newer program versions, the minimum spacing between automatic shelves can be specified in the General Cabinet Defaults. This can be accessed by navigating to Edit> Default Settings, expanding the Cabinet category, highlighting General Cabinet, then clicking Edit.
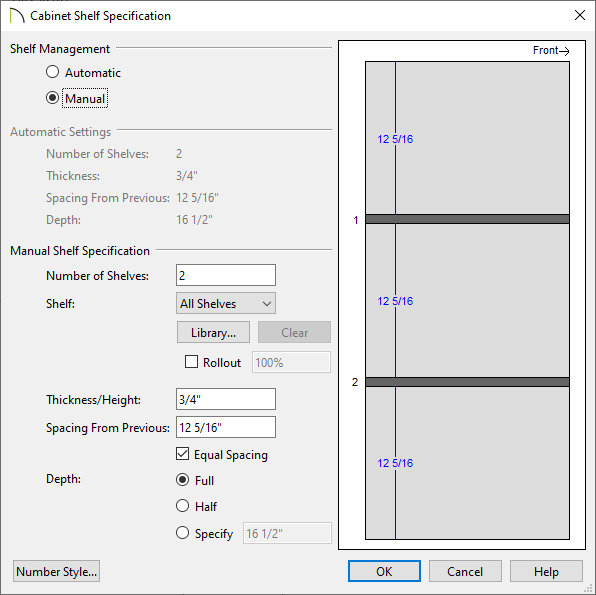
- In the Cabinet Shelf Specification dialog that displays:

- Select the Manual radio button under the Shelf Management section to open up the options under the Manual Shelf Specification section.
- Specify the Number of Shelves.
- Notice that each shelf in the diagram is numbered. To determine which shelf to adjust, select the shelf number or All Shelves from the drop down list.
- A different shelf style can be selected by clicking on the Library button. Additionally, rollout shelves can be specified by checking the Rollout box and entering the amount the shelf rolls out when set to Show Open. For more information on rollout shelves, please see the Related Articles section below.
- Enter a shelf Thickness/Height value.
- Specify the Spacing From Previous, which is the distance from the bottom of the selected shelf to the top of the shelf below it. If this value is changed, the Equal Spacing option will become unchecked.
- Select Full, Half or Specify the shelf Depth.
- Once all desired changes have been made, click OK.
-
Repeat this process for any other areas of the cabinet where shelves need to be modified.
-
Make any other desired changes, such as to the Materials, then click OK.
- Create a Camera
 view to see the results.


 edit button.

