The information in this article applies to:

QUESTION
How do I create a waterfall countertop?

ANSWER
A waterfall countertop is a countertop that 'falls' off the edge of a set of cabinets, creating the appearance of a continuous surface that blends from the top surface down the side. This look can be achieved automatically in X12 and newer program versions, or manually by setting a custom countertop to be taller than it is wide and placing it beside the cabinets.
To place the cabinets and set their dimensions
- Navigate to Build> Cabinet> Base Cabinet
 then click once in the plan to place a base cabinet.
- Using the Select Objects
 tool, select the cabinet and then click the Open Object
  edit button.
- In the Base Cabinet Specification dialog that opens:
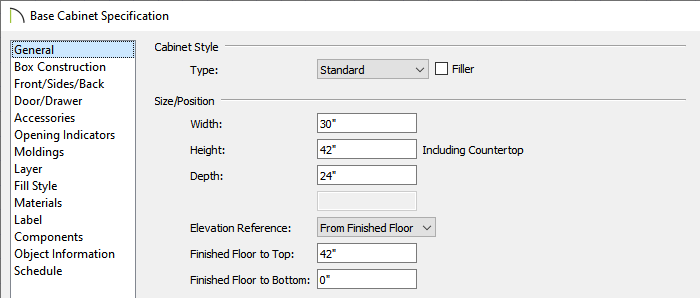
- Set the Width of the cabinet.
In this example, 30" is used.
- Set the Height of the cabinet.
In this example, 42" is used.
- Make any other desired changes, then click OK.
- With the cabinet still selected, click the Copy/Paste
 edit button, then click the Sticky Mode
  edit button.
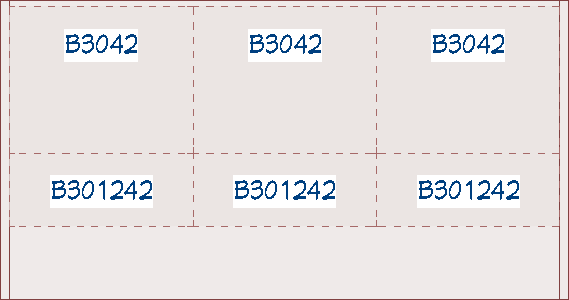
- Click 5 times in the plan to place 5 copies of the base cabinet, then click on the Select Objects tool once again.
- Use the Move
 and Rotate
  edit handles for each of the cabinets to move the them into place.

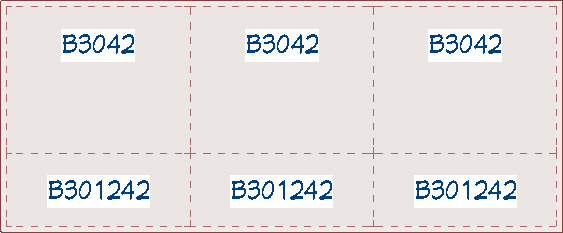
- Group select the three cabinets on the Breakfast Bar side of the island and click on the Open Object edit button.
- In the Base Cabinet Specification dialog that opens, set the Depth to your desired value, then click OK.
In this example, 12" is used.
To add the custom countertop
- Select Build> Cabinet> Custom Countertop
 from the menu.
- Click and drag a rectangle over the top of your cabinets to place your countertop.
Creating a custom countertop over existing base cabinets will override any automatic countertops that were part of the cabinet.
- Resize the countertop to your liking.
In this example, a 1" overhang was added to the front, a 1 1/2" overhang was added to the left and right sides, and a 12" overhang was added for the Breakfast Bar on the back.
To create waterfall panels automatically*
*Applies to Chief Architect X12 and newer versions.
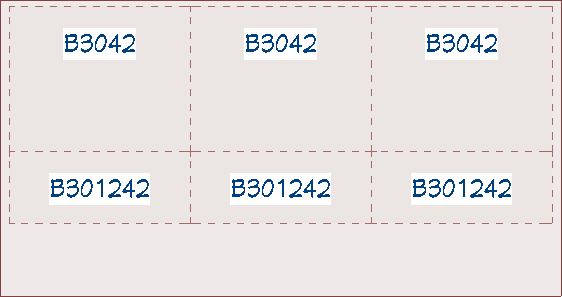
- Using the Select Objects tool, click on an edge of the custom countertop that you would like to add a waterfall edge to.
In the image below, the right side of the countertop is selected.

- Click the Open Object edit tool.
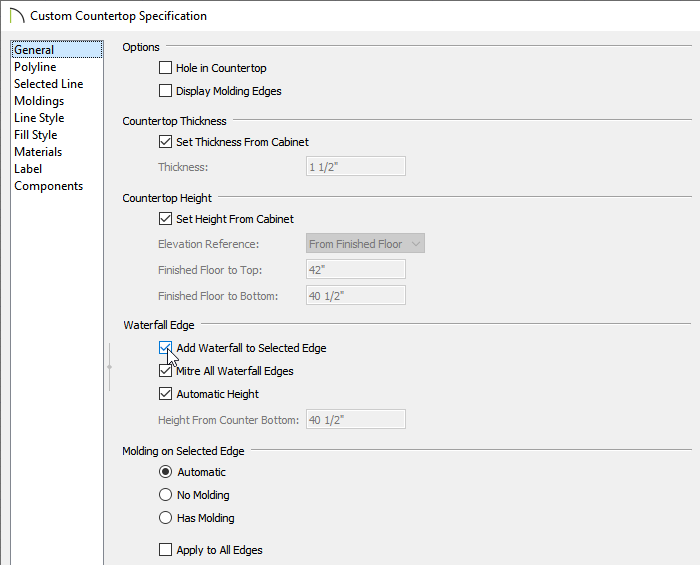
- In the Custom Countertop Specification dialog that displays, check the Add Waterfall to Selected Edge box under the Waterfall Edge section, make any other desired changes to the countertop, then click OK.
- Perform the same procedure on any additional sides you would a waterfall edge applied to.
You can also use the Add Waterfall to Selected Edge  edit tool when an edge of a countertop is selected.
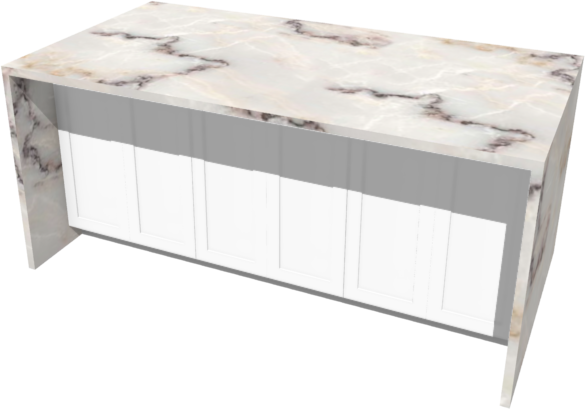
- Take a Camera
 view to see the results.
To create waterfall panels manually
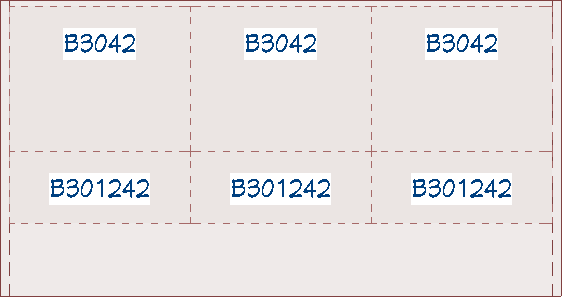
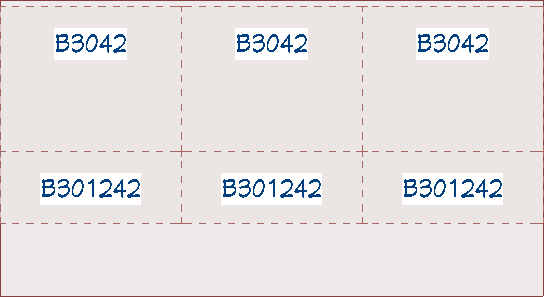
- Resize the custom countertop so that the left and right sides are flush with the cabinet sides.
- Select Build> Cabinet> Custom Countertop from the menu.
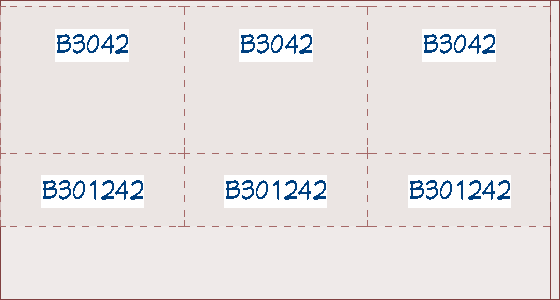
- Click and drag a rectangle beside the group of cabinets to create a waterfall panel.
- Resize the panel to your liking.
- With the Select Objects tool, select the panel and then click Open Object .
- In the Custom Countertop Specification dialog that opens:
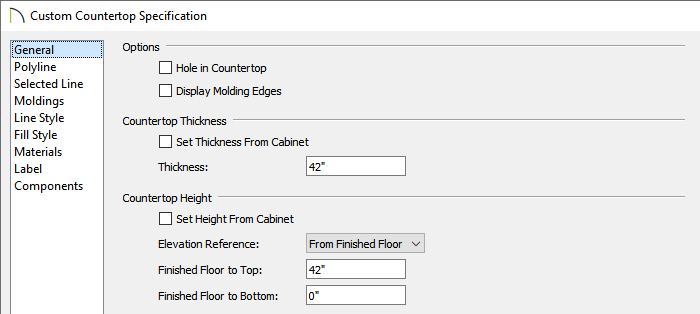
- Remove the check from the Set Thickness From Cabinet box and specify a value in the Thickness box.
In this example, the Thickness can be seen as the overall height of the panel that we are creating. We specified a value of 42".
- Remove the check from Set Height From Cabinet box and specify a value in the Finished Floor to Top/Bottom box.
In this example a value of 42" is specified in the Finished Floor to Top field.
- Make any other desired changes, then click OK.
- With the waterfall panel still selected, click the Copy/Paste edit button, then click the Reflect About Object
 edit button.
- Move the cursor so the reflect about line is centered on the group of cabinets, and then click to create a reflected copy of the panel.
- The waterfall countertop will now display on both sides of this kitchen island.