The information in this article applies to:

QUESTION
How do I set the joist depth for one particular room in my design?
ANSWER
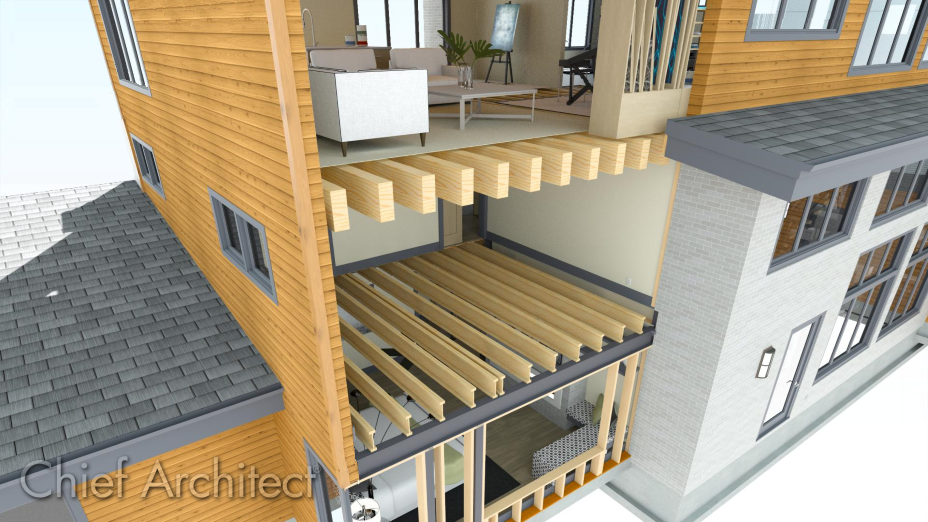
The joist depth can specified for an entire plan, on a floor-by-floor basis, on a room-by-room basis, or for an individual joist. However, resizing an individual joist in this manner will not affect the space allotted for it in the floor or ceiling platform that it is located within.
To specify joist depth for an entire plan
- Select Edit> Default Settings
 from the menu, expand the Floors and Rooms category, select Floor/Ceiling Platform, then click Edit.
- In the Floor/Ceiling Platform Defaults dialog that opens, click Edit next to Floor Structure or Ceiling Structure.
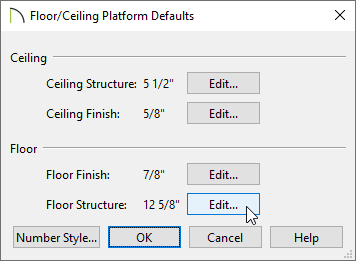
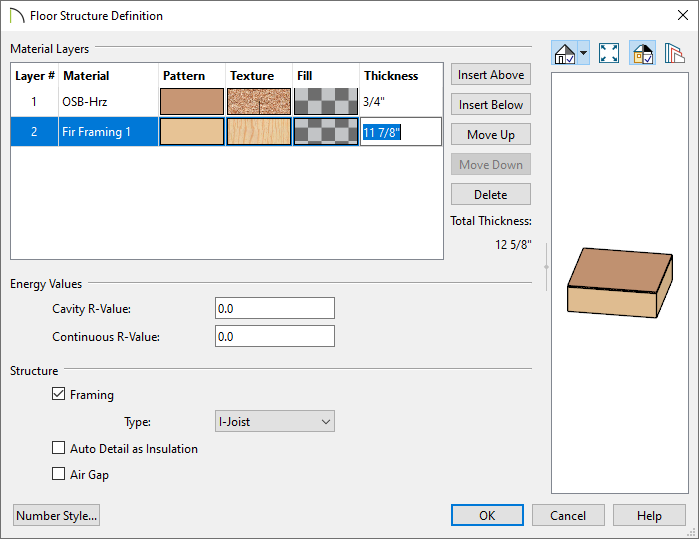
- In the Floor/Ceiling Structure Definition dialog that displays, change the Thickness of the framing layer to your desired value, then click OK.
In most cases, Layer #2 is the framing layer. Framing layers typically have a framing material applied, and will have the Framing box checked under the Structure section at bottom of the dialog.
- Click OK and Done to close the remaining dialogs.
- Now, when you generate floor and/or ceiling framing, the joists will have the depth specified.
To specify joist depth for a single floor
- Select Edit> Default Settings
 from the menu, expand the Floors and Rooms category, expand the Floor Levels category, select the floor level that you want to adjust, then click Edit.
In this example, the 1st Floor is selected for editing.
Navigate to Build> Floor> Build New Floor to create a additional floor levels in your design. When creating new floors, a Floor Defaults dialog will display where the Floor Structure can be edited to your liking before the floor is established.
- On the Structure panel of the Floor Defaults dialog that displays, click Edit next to Floor Structure or Ceiling Structure.
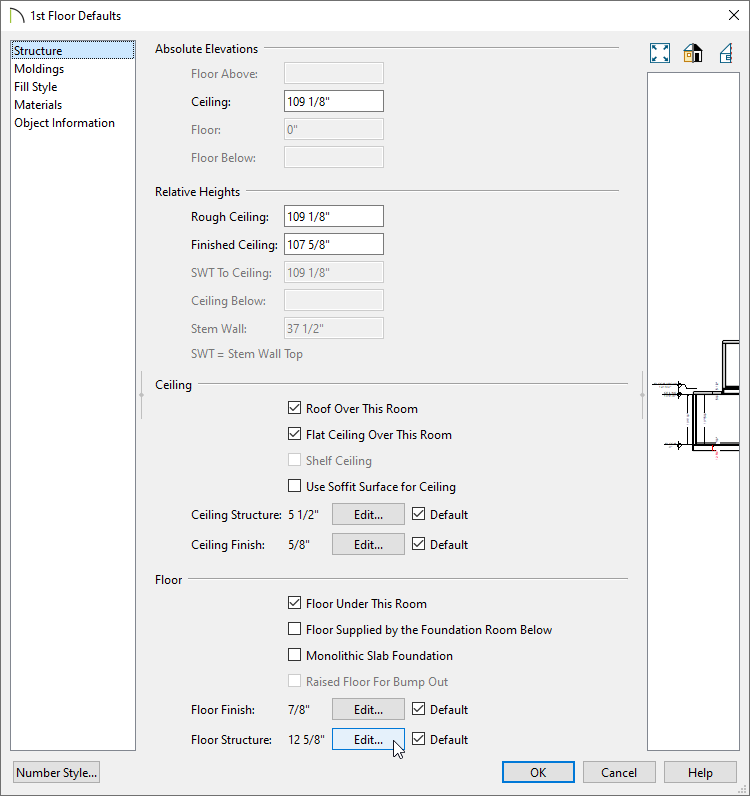
- In the Floor/Ceiling Structure Definition dialog that displays, change the Thickness of the framing layer to your desired value, then click OK.
In most cases, Layer #2 is the framing layer. Framing layers typically have a framing material applied, and will have the Framing box checked under the Structure section at bottom of the dialog.
- Click OK and Done to close the remaining dialogs.
- Now, when you build or rebuild framing for the floor(s) that you modified, the joists will have the depth that you specified.
To specify joist depth for an individual room
- Using the Select Objects
 tool, click in an empty space in a room to select it, then click the Open Object
  edit button.
- On the Structure panel of the Room Specification dialog that displays, click Edit next to Floor Structure or Ceiling Structure.
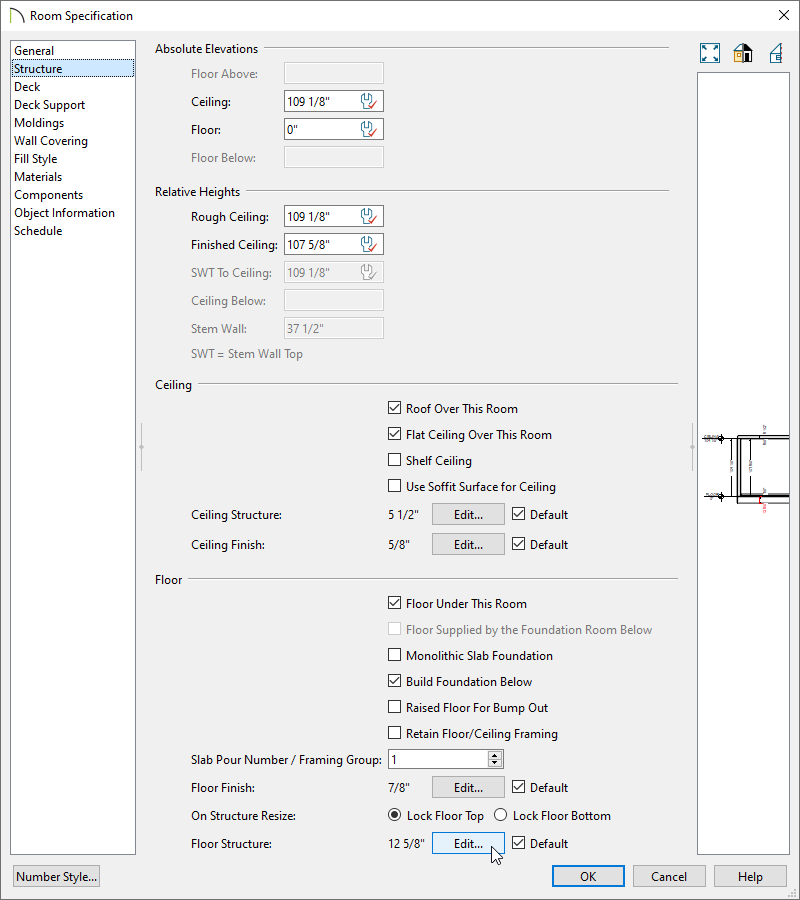
- In the Floor/Ceiling Structure Definition dialog that displays, change the Thickness of the framing layer to your desired value, then click OK.
In most cases, Layer #2 is the framing layer. Framing layers typically have a framing material applied, and will have the Framing box checked under the Structure section at bottom of the dialog.
- Click OK.
- Now, when you build or rebuild framing for the current floor, the joists in this room will have the depth that you specified rather than the default depth.
To specify the depth of an individual joist
When a joist is generated automatically or drawn manually, it's initial depth will be based on the default joist depth for the current floor, or the depth specified for an individual room on that floor. Once a joist is created, you can edit its depth in the Framing Specification (Floor/Ceiling Joist) dialog. Bear in mind, though, that it may not fit within the platform that it was placed in.
- Using the Select Objects
 tool, click on a joist to select it, then click the Open Object
  edit button.
-
On the General panel of the Framing Specification (Floor/Ceiling Joist) dialog:
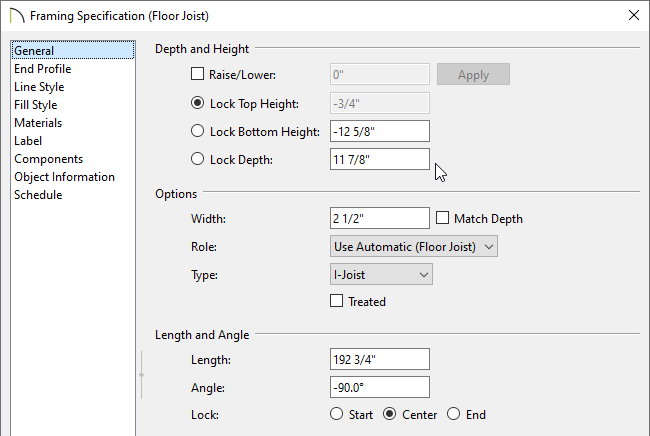
- Ensure that the Raise/Lower box is unchecked.
-
Move the Lock radio button to either Lock Top Height or Lock Bottom Height, depending on which end of the joist you want to lock.
-
Specify the desired depth value in the Lock Depth field.
-
Click OK.

 from the menu, expand the Floors and Rooms category, select Floor/Ceiling Platform, then click Edit.

 from the menu, expand the Floors and Rooms category, expand the Floor Levels category, select the floor level that you want to adjust, then click Edit.
 tool, click in an empty space in a room to select it, then click the Open Object
  edit button.
 tool, click on a joist to select it, then click the Open Object
  edit button.