QUESTION
The walls in my model are visible in plan view and I can select them and open their specification dialog, but when I create 3D camera views, they are not visible. How do I correct this?
ANSWER
There are several reasons why walls that are visible in a plan view might not be visible in 3D camera views: the Hide Camera-Facing Exterior Walls tool is enabled, the walls are specified as "Invisible" in their specification dialog(s), the "Walls, Normal" layer or other "Wall..." layers are not set to display in 3D camera views, or the ceiling heights of the rooms that the walls are enclosing are set to 0, preventing the program from generating walls upward.
Floor Overviews show the current floor, not including the ceiling, plus any floors beneath it. For example, if you create a Floor Overview on floor 1, but a floor 2 exists in the plan, the walls on floor 1, along with the content below that floor will display in the 3D view; walls present on any higher floors will not be visible unless you navigate to one of those floors.
To see all of the content located in a plan, use a Full Overview camera instead.
To restore the display of walls in 3D
- While in a camera view, navigate to 3D> Camera View Options
 to see if the Hide Camera-Facing Exterior Walls
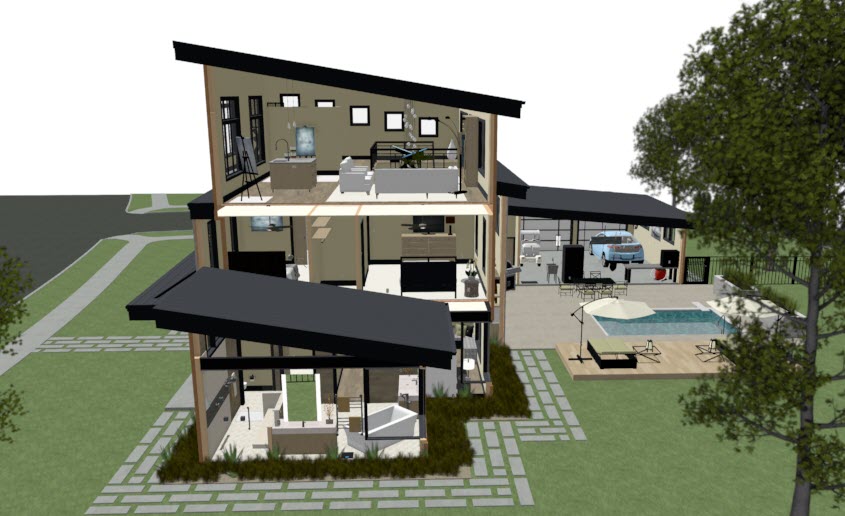
  setting is enabled. When enabled, exterior walls facing the camera will be hidden, like shown in the image below. Select this setting to toggle this functionality on/off.
- If the setting above is disabled and you're still experiencing issues with seeing your walls, select one of the problem walls, then click on the Open Object
 edit button.
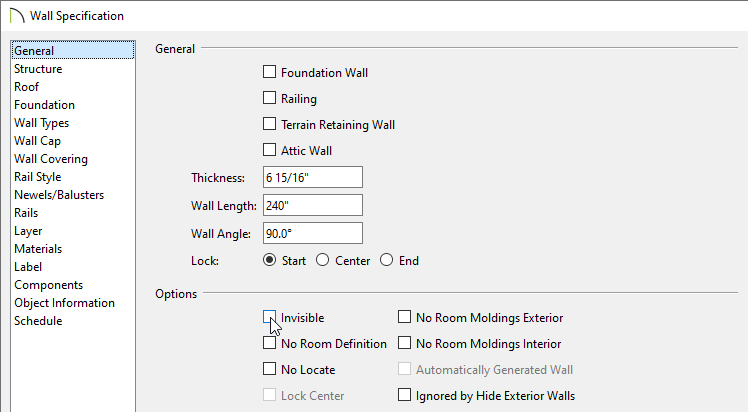
- On the General panel of the Wall Specification dialog, ensure the Invisible box is unchecked.
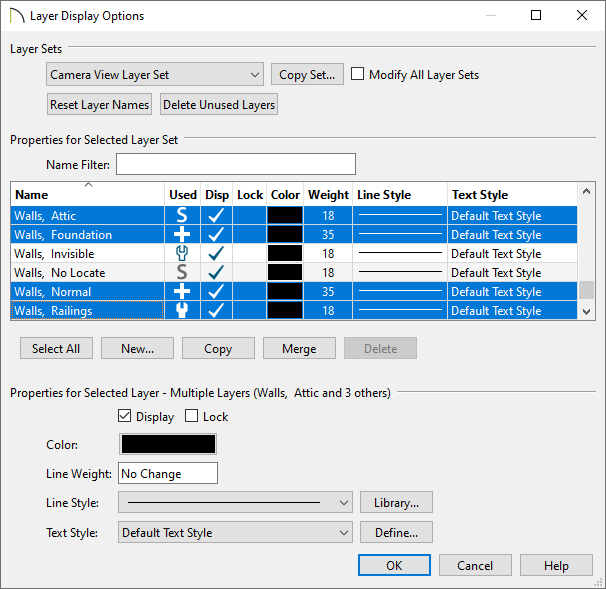
- If unchecking the setting above does not resolve the problem, select Tools> Layer Settings> Display Options
 while in a camera view, ensure the Camera View Layer Set is specified, then make sure the "Walls, Attic," "Walls, Foundation," "Walls, Normal," and "Walls, Railing" layers are set to display.
*If you are using a different layer set for your camera views, ensure that the layers mentioned above are displayed in that layer set instead.
*Additionally, if your walls, and/or the walls assembly layers have been placed onto different layers, ensure that the correct layers are set to display. For more information, please refer to the "Adjusting the Display of Wall Layers" resource in the Related Articles section.
*Applies to Chief Architect only.
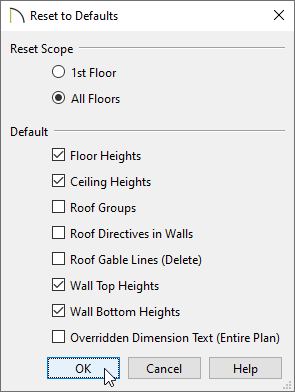
- If enabling the various display layers does not resolve the problem, Select Edit> Reset To Defaults from the menu, and in the dialog that displays:
- Select the All Floors option.
- Check the Floor Heights, Ceiling Heights, Wall Top Heights and Wall Bottom Heights boxes, then click OK.
You can also reset the floor and ceiling heights of rooms in your plan on a room-by-room basis in the Room Specification dialog; however, Reset to Defaults is a faster and more thorough option.
- Finally, select Build> Floor> Rebuild Walls/Floors/Ceilings
 from the menu. If you're still in an active camera view, navigate to 3D> Rebuild 3D
  as well.


