The information in this article applies to:

QUESTION
I would like to create and use a layout template in Chief Architect. How do I do this?
ANSWER
A template file has all of your preferred default settings, layer display options, and other file-specific information saved and waiting for you.
A layout template can also feature a border with your company information, logo, text macros and other details. When you identify a file as a template, Chief Architect refers to that file for this information any time you open a new layout file.
Creating a layout template is easy and can save you a lot of time when creating a new layout file. In this article, we will discuss how to:
To setup the orientation and size
- In a new layout file, navigate to File> Print> Drawing Sheet Setup
 .
.
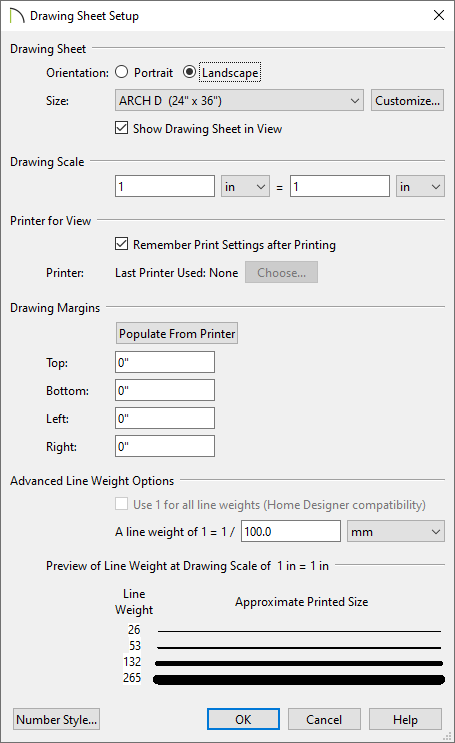
- Set the Drawing Sheet Orientation and Size to your liking.
In most cases, the Printer Paper and Drawing Sheet sizes should be the same.
- Make sure the Drawing Scale is set at a 1 to 1 scale.
Example: 1 in = 1 in
It is important not to change this, as the drawing scale is set when you send individual views to the layout.
For more information about drawing scale as well as line weight scaling, click the Help button at the bottom of this dialog.
- Make any other desired changes, then click OK to apply your settings and close the dialog.
To setup layout box defaults*
*Applies to X14 and newer program versions
- Navigate to Edit> Default Settings
 , select Layout Box, then click Edit.
- On the Line Style panel of the Layout Box Defaults dialog:
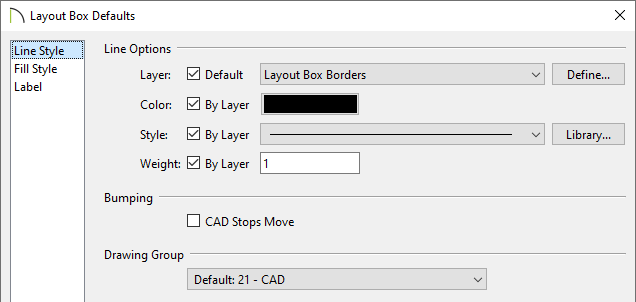
- Set the Layer the layout boxes will be created on.
- Choose the line Color, Style, and Weight if the layout box borders are set to display.
- If you want CAD information to stop the movement of the layout box, check the box for CAD Stops Move.
- Set the Drawing Group you want these layout boxes to display with.
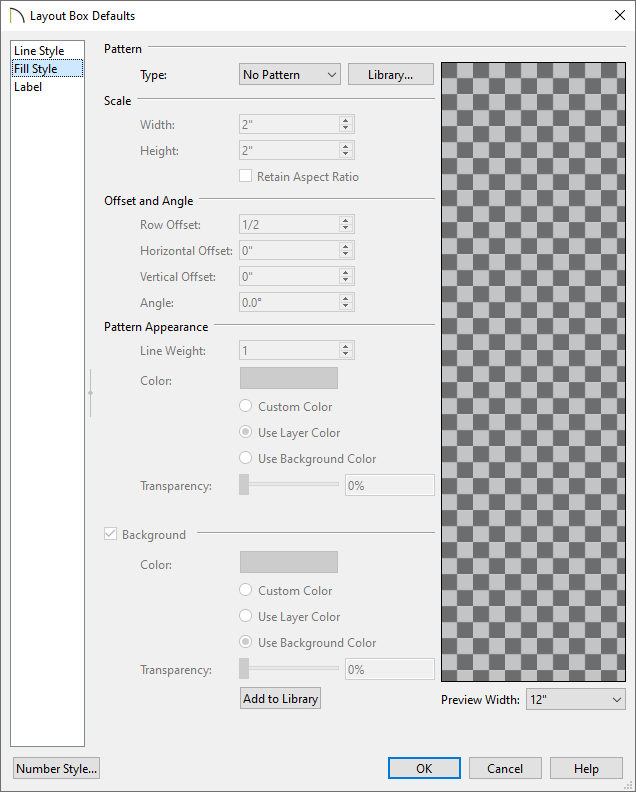
- On the Fill Style panel, choose a Pattern, Scale, Offset and Angle, and Pattern Appearance if you want the layout boxes to come in with a fill for the entire view.
- On the Label panel:
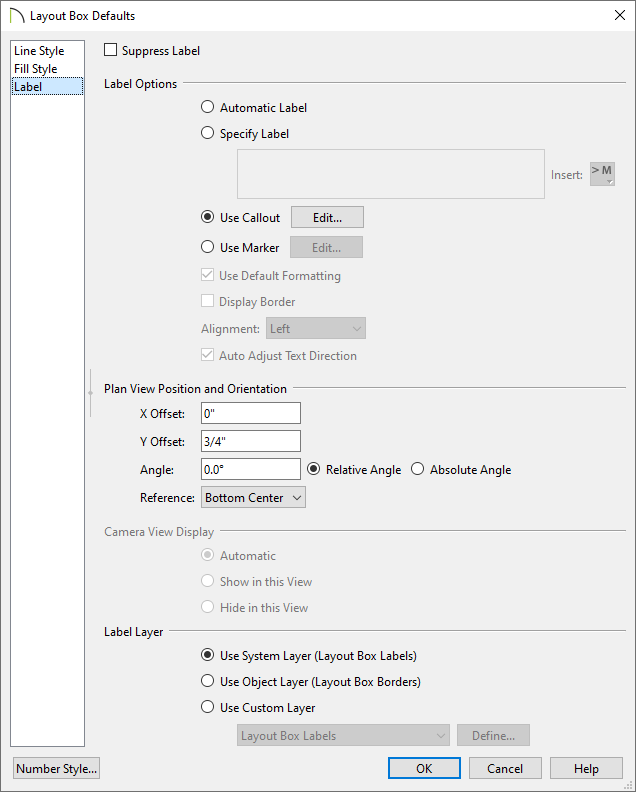
- Choose if you want to Suppress Label, use the Automatic Label, Specify Label, use a Callout, or use a Marker for your layout box labels.
Using a Callout or a Marker will allow you to Specify details of that callout or marker respectively.
- Decide if you want to display a border around the label and the alignment of the label.
- Set the Position and Orientation of the label.
- Decide what layer the label should be on.
- Click OK and Done to close the dialogs and confirm the changes.
To set default designer and client information
In X15 and newer versions, you are able to set default designer/client information within the Preferences dialog.
In X14 and prior versions, you can still set this information, but it must be done in each individual plan/layout, or within your template file.
- To set this information in X15 and newer versions, select Edit> Preferences
 from the menu if you're on a Windows PC or Chief Architect> Preferences
  if you're on a Mac. In the Preferences dialog that opens, access the New Plans panel.
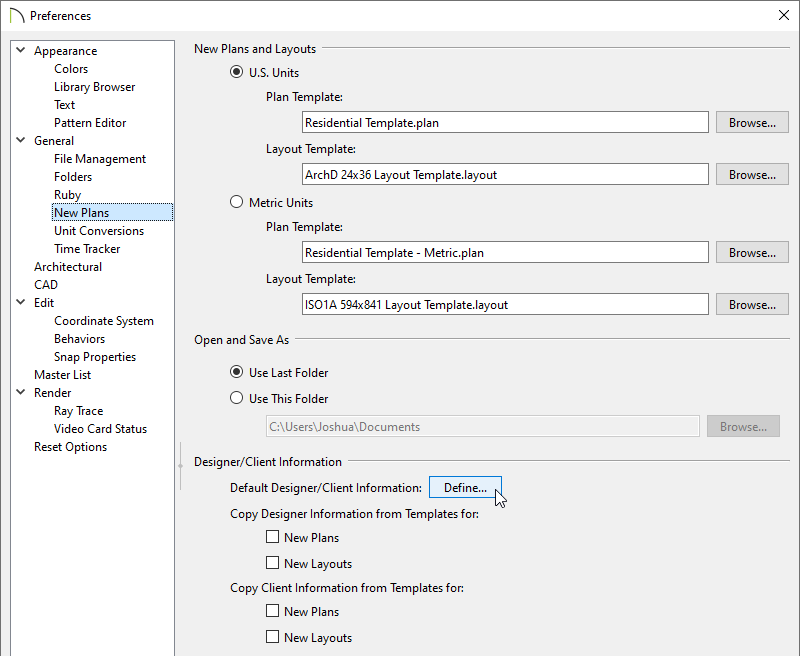

- To the right of Default Designer/Client Information, click Define.
- Fill out the information for both the designer and the client. Once you are done filling out this information, click OK.
- Next, you can choose whether you'd like to copy this information to your newly created plans or layouts by checking the boxes for New Plans or New Layouts which can then be reported by using macros.
In X14 and prior versions, you can still set this information, but it must be done in each individual plan/layout that you're working with, or within your template file.
-
Open
 your layout template or the file where you would like to specify this information.
- Navigate to Tools> Designer/Client Information and select either the Designer Information
 or Client Information
 to edit it.
- Fill out the information, then click OK.
- To report the Designer/Client information in your files, you will need to use a text macro. Macros are commands that insert dynamic information into a text box. They are available in both plan and layout files, but are particularly useful in layouts.
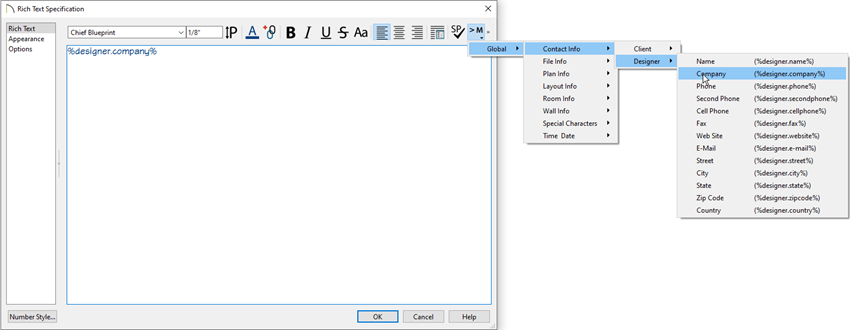
- In your layout template file, navigate to CAD> Text> Rich Text
 .
.
- Click at your preferred location to open the Rich Text Specification dialog.
- Select the Insert Macro
 tool, then navigate to Global> Contact Info> Client/Designer and select the macro that correlates to the information you would like to be reported. You can then use these macros when creating your custom title block.
To create a layout border and title block
- First, go to Page 0 of the layout file.

Page 0 is the Default Page Template. Items placed on this page show on every page of the layout that is assigned to follow this Page Template. It's possible to set up more than one page template. Please refer to the Related Articles section below for more information.
- Using the CAD tools, create a border and title block that you want to display on each page of the layout.
- Using Text
 or Rich Text
  , add a company name, project information, and any other notations that you may want to display on each page of the layout.
- To insert a company logo, image, or PDF, select File> Import> Import Picture
 or File> Import> Import PDF
  .
.
- After placing a text object in the layout, select the Insert Macro
 tool to insert a macro.
Macros are available in both plan and layout files, and allow you to automatically insert information such as the page number, date and time, and file name.
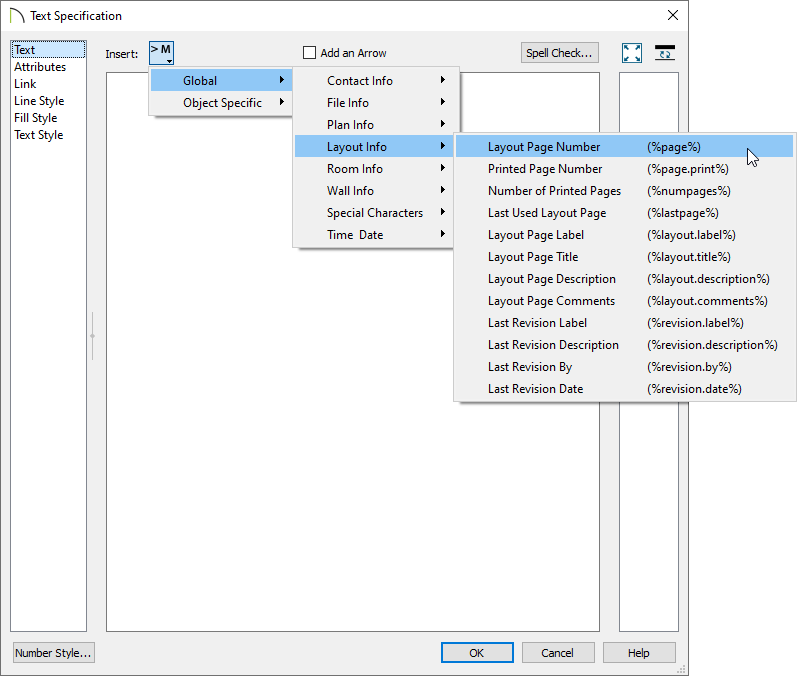
- You can use the Layout Page Number (%page%) macro to show the page number for each page of the layout.
- Use one of the Time or Date macros to insert the date or time in the layout to automatically let you know when you printed this layout.
- Add the file name for this layout sheet using one of the File Info text macros.
- Inserting this next to the binding edge will allow you to determine which file it is or even where this set of plans is located on your computer, should you need to reprint them in the future.
To save and use the file as a template
- Select File> Templates> Save As Template
 .
.
- In the Save as Template dialog that displays:
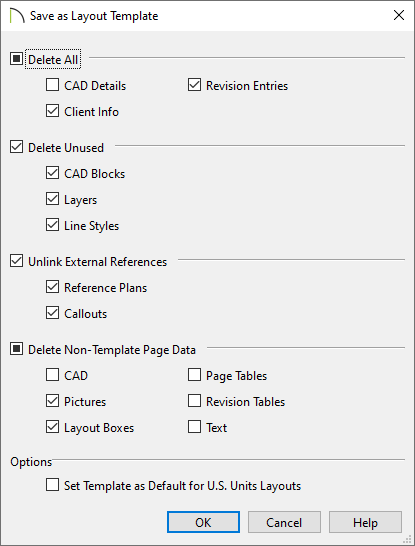
- Check the box beside each category of object or data that you want to delete from the current file.
In X13 and newer versions, the Delete Objects tool can be also be used to delete specific information from one or more pages of a layout file.
- Check Set Template as Default for Imperial/Metric Layouts to use the new template as your default template whenever you select File> New Layout
 .
.
- Click OK.
- Give the new layout template a short, descriptive name.
- Click Save, and the program will automatically save the template to the program's Templates directory on your computer.
To change the default layout template
You can change the default layout template that is used whenever you open a new layout file by accessing the program's Preferences dialog. If the Set Template as Default for Imperial/Metric Layouts was checked in the section above, it's not necessary to follow the instructions below as you've already set your customized layout to be the default layout template.
- Select Edit> Preferences
 from the menu if you're on a Windows PC or Chief Architect> Preferences
  if you're on a Mac.
- On the New Plans panel of the Preferences dialog:
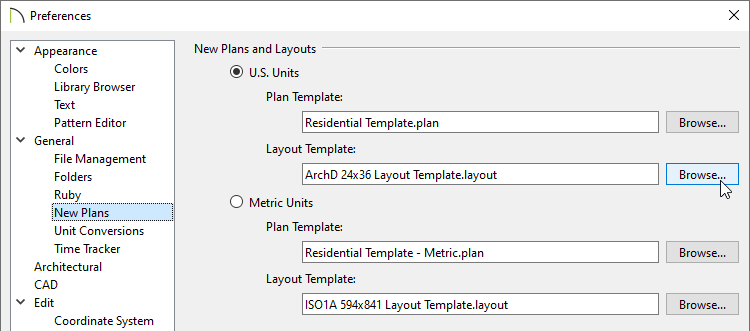
- Click the Browse button to the right of the Layout Template text field for the unit of measurement you're using.
- In the dialog that opens next, browse to the location of your new layout template file, select it, and then click Open to specify this file as your default layout template.
- Click OK to close the dialog.


 from the menu if you're on a Windows PC or Chief Architect> Preferences
  if you're on a Mac. In the Preferences dialog that opens, access the New Plans panel.

 or Rich Text

 from the menu if you're on a Windows PC or Chief Architect> Preferences
  if you're on a Mac.