QUESTION
When I send a view to layout, I receive one of the following messages:
- "#272012934 - At the selected scale, this view is too large to fit on the layout page. You can change the current scale by selecting the Layout Box and using the Rescale Layout View edit toolbar button."
- "#272032572 - At the selected scale, this view is too large to fit on the layout page. Do you want to continue?"
Why is this happening?
ANSWER
One of these messages may appear when you send a view to layout at a scale that makes it either taller than the layout drawing sheet's height or wider than its width, or both.
There are several ways to address this issue, including:
- Specifying a smaller scale for the view;
- Using a larger drawing sheet;
- Reducing the content displayed in the layout box.
To specify a smaller scale for the view
- Select the layout view that is too large to fit within the layout page and click the Rescale Layout View*
 edit button.
*Available in Chief Architect Premier and Chief Architect Interiors. If you're using Home Designer Pro, the view must be resent to the layout at a smaller scale.
- In the Change Box Scale dialog, reduce the scale, then click OK.
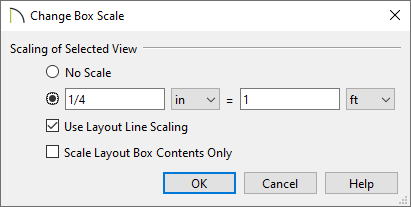
In Chief Architect Premier, additional layout box edit tools are available, including Pan/Scale Layout Box, Recenter Layout Box Contents, and Scale Layout Box Contents To Fit. To learn more about these tools, please access your program's documentation.
If you absolutely need to print the view at a particular scale, but that scale does not allow the view to fit on the layout sheet at its current size, then you will need to use a larger layout sheet. Bear in mind that if you change a layout file's drawing sheet size, you will also need to adjust the border and title block on Page 0. You may find it easier to simply create a new layout using a template with a larger drawing sheet. Please see the Related Articles section to learn more.
To use a larger layout drawing sheet
It's important that you are in a layout file and NOT a plan file while following the steps below.
- Within a layout file, navigate to File> Print> Drawing Sheet Setup
 .
.
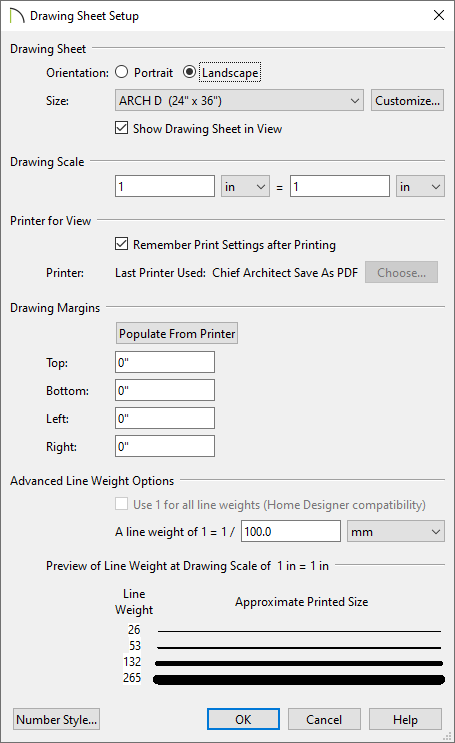
- In the Drawing Sheet Setup dialog, select the desired Size, ensure that the Drawing Scale is one to one (1 in = 1 in or 1 mm = 1 mm), then click OK.
- Switch to Layout Page 0 and edit the layout's title block and border so that it fits the new drawing sheet size. Please see the Related Articles section to learn more.
If the layout view in question includes objects that you do not actually need to display, you can turn off the layers associated with those objects and then edit the layout view's box so that it is smaller.
To reduce the content displayed in the layout box
- Examine the layout view that was sent and identify any objects that you do not need to show.
For example, if the view in question is meant to show the kitchen in plan view, you likely don't need to show the terrain.
- Click on the layout box to select it, then click the Layout Box Layers*
 edit button.
*Available in Chief Architect Premier and Chief Architect Interiors. If you're using Home Designer Pro, access the original view located in the plan file, toggle any unwanted layers off, then resend the view to layout.
- In the Layer Display Options dialog:
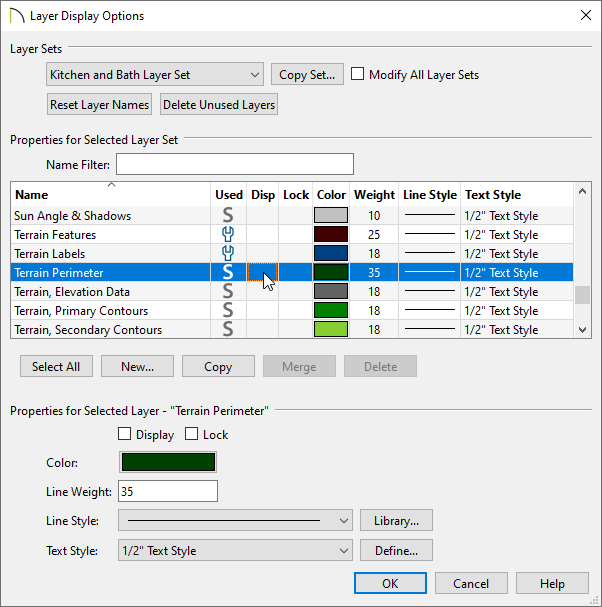
- Notice the name of the Layer Set at the top of the dialog box. Keep in mind that any other views that use this Layer Set will be affected by changes that you make.
- Turn off the display of any unwanted layers by removing the check from the Disp column or Display checkbox.
- Click OK.
- With the layout box still selected, use the various edit handles to resize and reposition the box, as needed.


