The information in this article applies to:

QUESTION
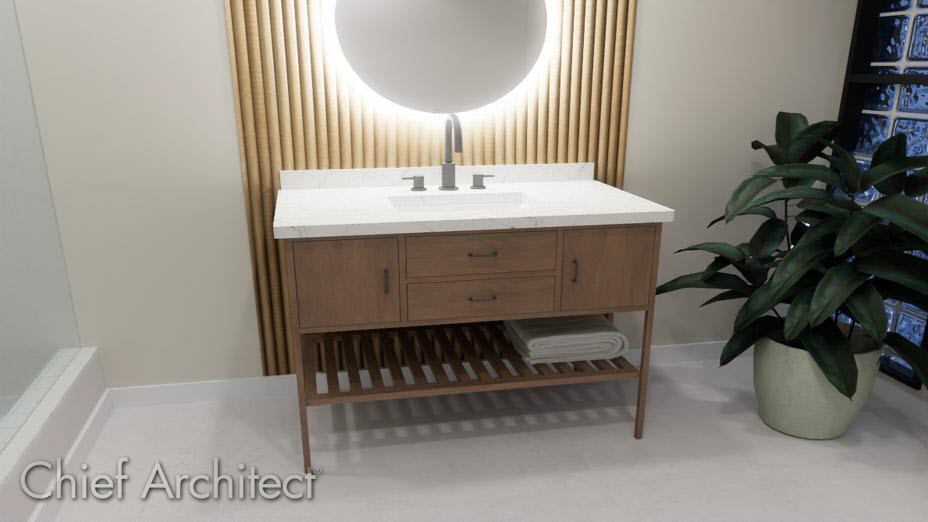
I would like to create an open shelf vanity that I can customize and reuse for future designs. Can this be done in Chief Architect?
ANSWER
You can use a base cabinet to create custom vanities that can then be saved to your User Library for future use in other projects. Some designs may require no sides or back to the cabinet, which can be done in Chief Architect Premier.
To prepare your cabinet for an open shelf vanity design
- To first place the cabinet go to Build> Cabinet> Base Cabinet
 from the menu, then click in the plan to place your cabinet.
- Using the Select Objects
 tool, select your cabinet and use the Open Object
  edit tool to open its specification.
- In the Base Cabinet Specification, on the General panel, set your Width, Height, and Depth.
In this example, a Width of 60", a Height of 36", and a Depth of 24" are specified.
- Remaining on the General panel uncheck the option for Toe Kick, if you are looking to make more of a table style vanity.
- On the Box Construction panel remove the bottom of the cabinet by selecting No Bottom.
- Set your Door/Drawer Overlay to your desired overlay.
In this example, we will be using Inset.
- On the Front/Sides/Back panel, customize the front to your desired door/drawer layout. If you'd like to create the layout shown in the picture above, please follow these next steps:
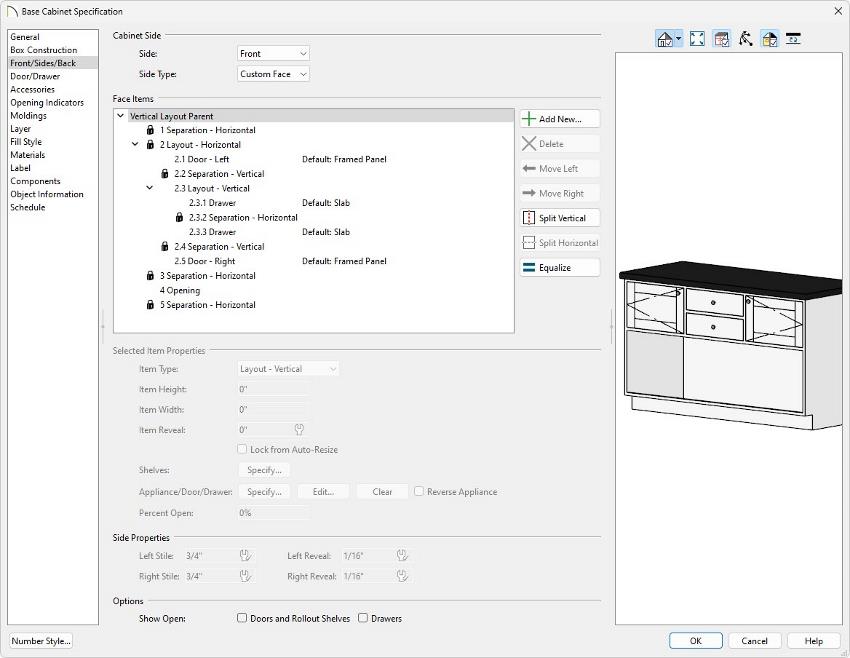
- Select the 2 Drawer face item from the Face Items list and select the Split Vertical button to split it into two drawers.
- Select either the 2.1 Drawer or the 2.3 Drawer face item and select the Split Vertical button to create three drawers.
- Select the 2.1 Drawer face item located on the left side of the cabinet, and change its Item Type to Door - Left.
- Select the 2.5 Drawer face item located on the right side of the cabinet, and change its Item Type to Door - Right.
- Select the 2 Layout - Horizontal face item that contains your doors/drawers and click the Equalize button.
- With the 2 Layout - Horizontal face item still selected, set the Item Height to the height your cabinet doors will be.
In this example, this is set to 12".
- Select the 2.3 Drawer face item and click the Split Horizontal button to split it into two.
- Select the 4 Door - Auto Right face item and change it's Item Type to Opening.
For more information on customizing cabinet fronts please see the Related Articles at the bottom of this article.
- Once you have your desired cabinet layout, select the 5 Separation - Horizontal face item, and click the Delete button.
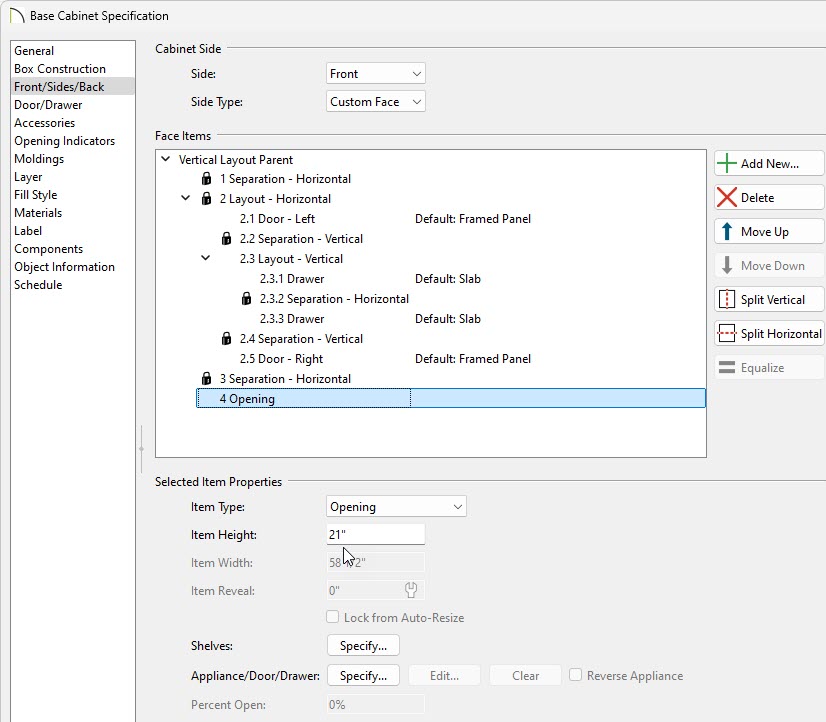
- Next, select the 4 Opening face item and note the Item Height.
In this example, an Item Height of 21" is specified.
To add a shelf into the opening
- On the Front/Sides/Back panel, select the 4 Opening face item and click the Specify button next to Shelves.
- In the Cabinet Shelf Specification that displays, set your Shelf Management to Manual.
- Underneath the Manual Shelf Specification section:
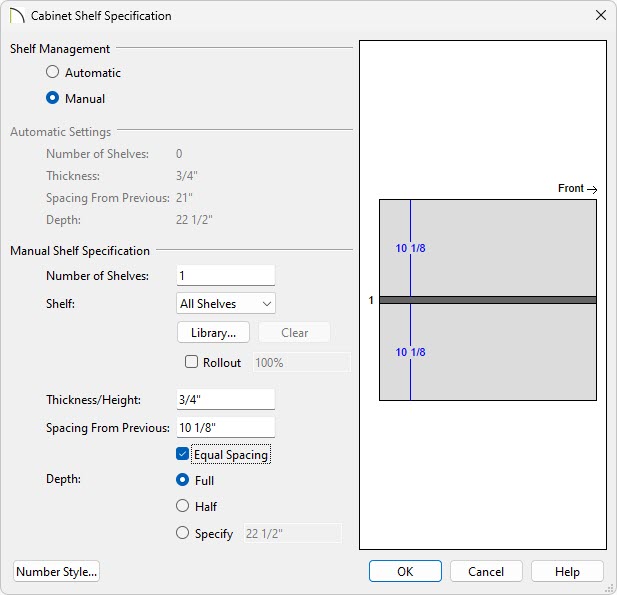
- Set your Number of Shelves.
- To change the shelf style, click on the Library button, and browse the library for a suitable shelf style.
In this example, the Slatted Shelf - Short shelf from the Core Library is being used. This can be found by clicking Library and going to Chief Architect Core Catalogs> Architectural> Cabinet Doors, Drawers, & Panels> Specialty Storage> Slatted Shelf - Short.
- Set the Thickness/Height of your shelves.
- Select Full, Half or Specify the shelf Depth.
- Adjust the Spacing From Previous to move the shelf within the opening.
- Once all desired changes have been made, click OK.
To adjust the sides and back of the cabinet
- On the Front/Sides/Back panel, change the Side to Back, and change the Side Type to Custom Face.
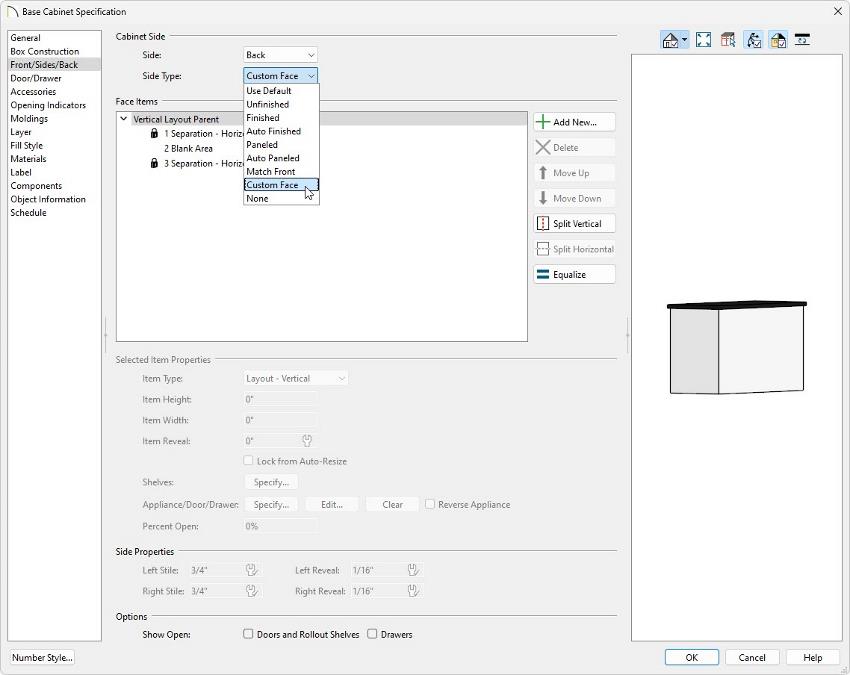
- In the Face Items list, select the 2 Blank Area face item and click the Split Horizontal button to split it into two.
- You will now have a 2 Blank Area face item and a 4 Blank Area face item. Select the lower 4 Blank Area face item and change its Item Type to an Opening.
- Select the 4 Opening face item and set its Item Height to the same as the opening on the front of the cabinet.
In this example, an Item Height of 21" is specified.
- Select the 5 Separation - Horizontal face item, and click the Delete button.
- Change your Side to Left/Right, then repeat Steps 1 - 5.
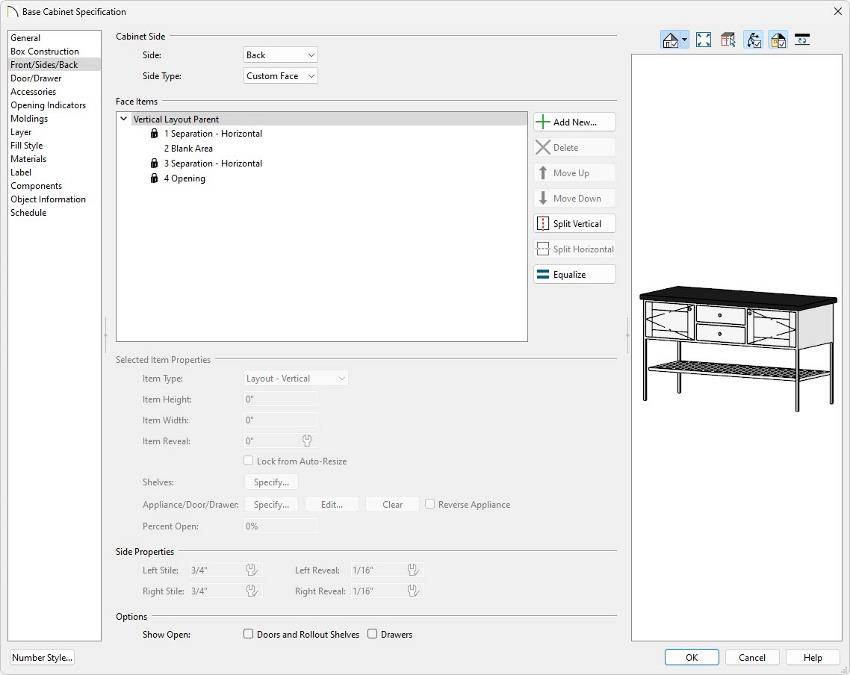
Once you've designed your cabinet, you can save it to your User Catalog for future use. Please see the Related Articles for more information.


