QUESTION
How can I create an L-shaped cabinet or bookshelf without a center stile or separation?

ANSWER
An L-shaped cabinet or bookshelf without a center/corner stile or separation can be created using two separate cabinets and modifying their properties to simulate a single, seamless cabinet. However, accomplishing such a task requires you to disable the Automatic Blind Corner Cabinet functionality within the General Cabinet Defaults.
To create an L-shaped cabinet without a center stile
- In your plan, navigate to Edit> Default Settings, expand the Cabinets category, select the General Cabinet option, then click Edit.
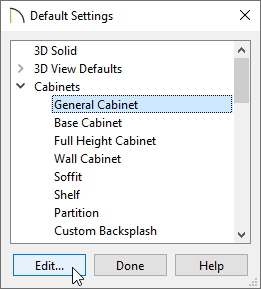
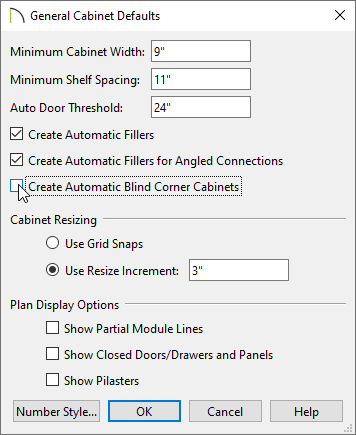
- In the General Cabinet Defaults dialog, remove the check from the Create Automatic Blind Corner Cabinets box, then click OK and Done.
- Navigate to Build> Cabinet
 and choose your desired Cabinet tool.
In this example, the Wall Cabinet tool is selected.
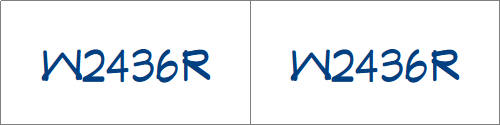
- With the tool selected, click in the plan to place two cabinets, side-by-side.
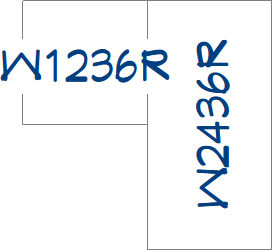
- Rotate one of the cabinets that was placed, then adjust the size of each cabinet until they form an L-shape.
- Using the Select Objects
 tool, click on the smaller of the two cabinets, click on the Open Object
  edit tool, and in the Cabinet Specification dialog that displays:
- On the Box Construction panel, select the Framed option under the Box Construction section, then set the Separation value to 0.
- On the Front/Sides/Back panel, ensure that the Side drop-down is set to Front, then adjust the face items, as necessary.
In this example, we deleted the Door face item.
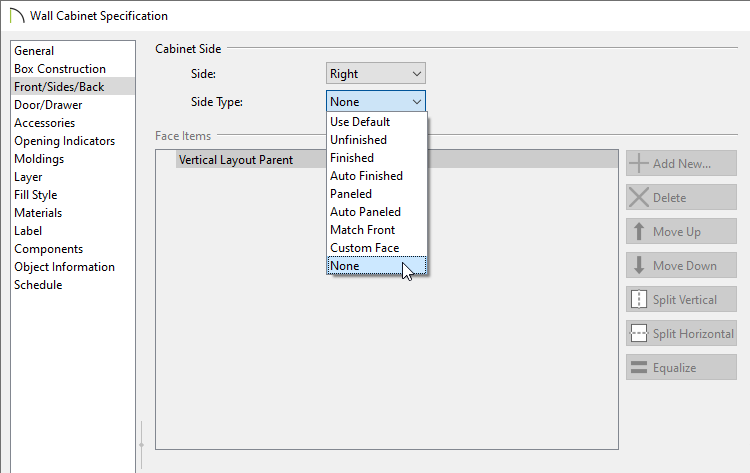
- Remaining on the Front/Sides/Back panel, use the Side drop-down at the top and set it to Left or Right; use the Side Type drop-down to set it to None, effectively removing the side panel from the cabinet.
- Make any other desired changes, then click OK.
- Next, select the larger of the two cabinets, click on the Open Object edit tool, and in the Cabinet Specification dialog that displays:
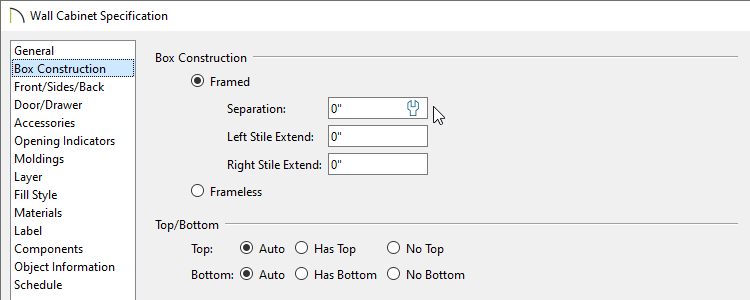
- On the Box Construction panel, select the Framed option under the Box Construction section, then set the Separation value to 0.
- On the Front/Sides/Back panel, ensure that the Side drop-down is set to Front, then adjust the face items, as necessary.
In this example, we deleted the Drawer and Door face items.
- Click OK.
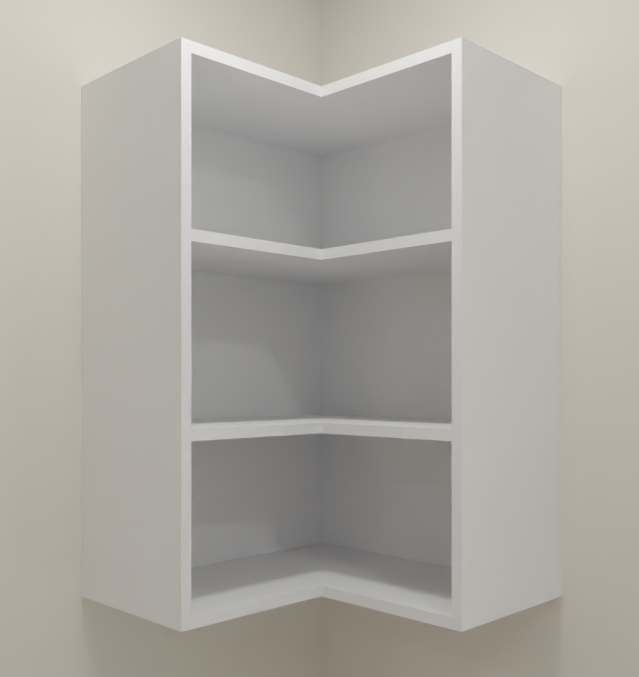
- Take a Camera
 view to see the results.
- Consider blocking the two cabinets together using the Make Architectural Block
 edit tool. You can then add the block to the User Catalog area of the Library Browser by clicking on the Add to Library
  edit tool for use in other projects.