The information in this article applies to:

QUESTION
How do I add a corner cabinet to a plan?

ANSWER
Corner cabinets can be created by first selecting a Cabinet tool, then clicking near an interior corner where two perpendicular walls meet. Existing cabinets can also be converted to corner cabinets using the specification dialog, and blind corner cabinets can be created using two separate cabinets, then bumping them up next to each other.
To automatically create a corner cabinet
- Select Build> Cabinet
 from the menu and choose the Base Cabinet
  , Wall Cabinet
  , or Full Height
  tool.
tool.
The Soffit tool can also be used to create corner soffits to match the shape of corner wall cabinets.
- With your desired Cabinet tool selected, move your cursor into the drawing area, and notice that a cabinet icon
 will follow your cursor.
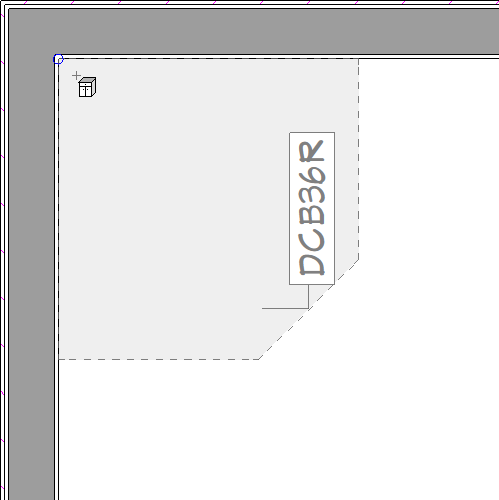
- Position your cursor in a corner where two walls meet and notice that the cabinet preview will change. Click once to place a corner cabinet at that location.

- Using the Select Objects
 tool, select the newly placed cabinet, then click the Open Object
  edit button.
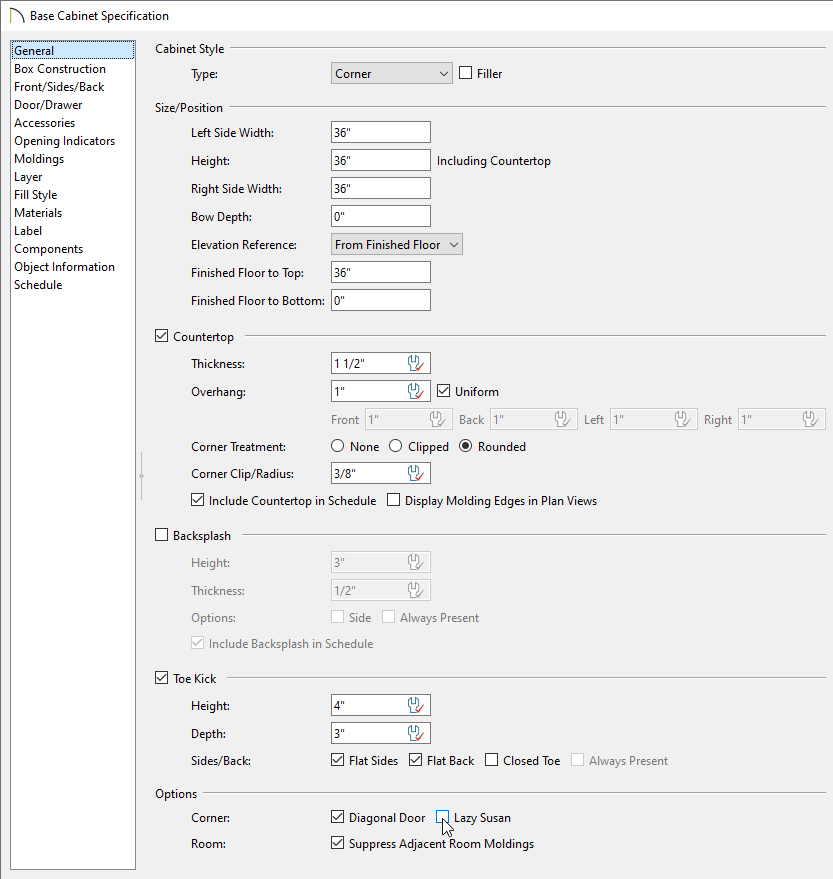
- On the General panel of the Cabinet Specification dialog that displays:

- Uncheck Diagonal Door if you want to replace the diagonal door with double doors at right angles. This option is checked by default in the Cabinet Defaults.
- Check Lazy Susan to indicate a lazy susan in the cabinet’s label and its appearance in plan view. This option does not display in 3D views.
- Click OK.
To specify an existing cabinet as a corner cabinet
- Click on a standard cabinet to select it and click the Open Object
 edit button.
- On the General panel of the Cabinet Specification dialog that opens:

- Change the Width value so that it is greater than the Depth value.
In this example, the Width is changed to 36" while the Depth remains at 24".
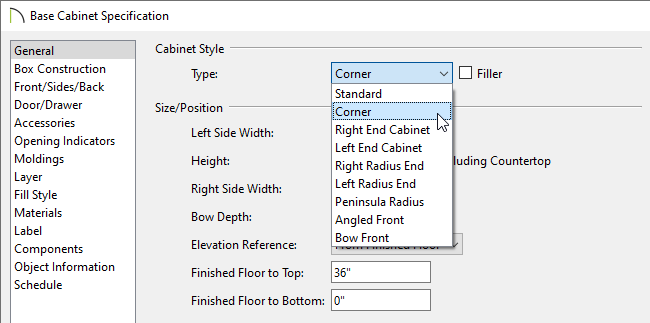
- Select Corner from the Cabinet Style Type drop-down.
- Click OK, and notice that your cabinet will become a corner cabinet, regardless of how it was originally created.

 will follow your cursor.
 edit button.
 edit button.
