The information in this article applies to:

QUESTION
When I build framing for my model, the entire structure frames quite nicely. However, despite my best efforts, the floor and ceiling will not frame. Why won't the framing generate in these areas?
ANSWER
Framing for the floor and ceiling will not generate, even if there is sufficient platform thickness for each, if certain attributes within the Room Specification dialog are set incorrectly. See the procedure below to ensure that these attributes within the Room Specification dialog are not conflicting with the framing of your model.
Trey ceiling framing is part of the roof framing component in Chief Architect. If you have recently created a trey ceiling, but you notice that the framing hasn't updated to accommodate the trey, try rebuilding your roof framing.
In X13 and newer versions, you can also select the trey ceiling polyline in your plan and click the Build Framing for Select Object(s) edit button to build the necessary framing.
To ensure that framing generates properly in your floor and ceiling platforms
- Using the Select Objects
 tool, click in a room in which floor and/or ceiling framing is not generating correctly, then click the Open Object
  edit button.
- On the Structure panel of the Room Specification dialog, make sure that both the Flat Ceiling Over This Room and Roof Over This Room boxes are checked.
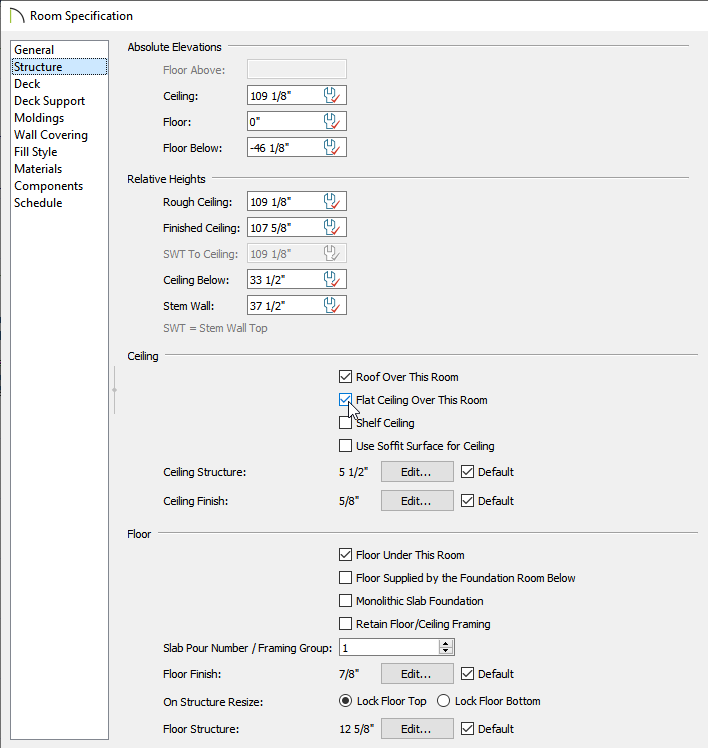
If Flat Ceiling Over This Room is unchecked, the ceiling follows the underside of the roof or manually drawn ceiling planes.
- Next, with the Structure panel still active, click the Edit button next to Ceiling Structure to display the Ceiling Structure Definition dialog.
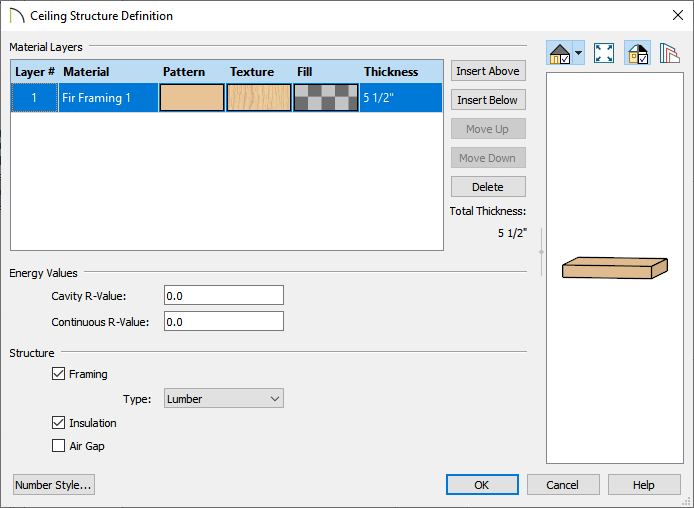
In X13, the Framing box needs to be checked for at least one of the Material Layers. When at least one layer has this box checked, specify the Type of framing, as well as an appropriate Thickness, then click OK.
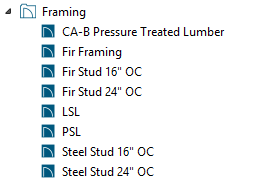
In X12 and prior versions, a framing material needs to be specified for at least one of the Material Layers. You can click on the Material name for a specific layer to browse the Library for an appropriate framing material. Once one has been chosen, set the Thickness and Structure Type to your liking, then click OK. For reference, framing materials can be located by navigating to Chief Architect Core Catalogs> Materials> Framing.
- Repeat this process for the Floor Structure, then click OK.
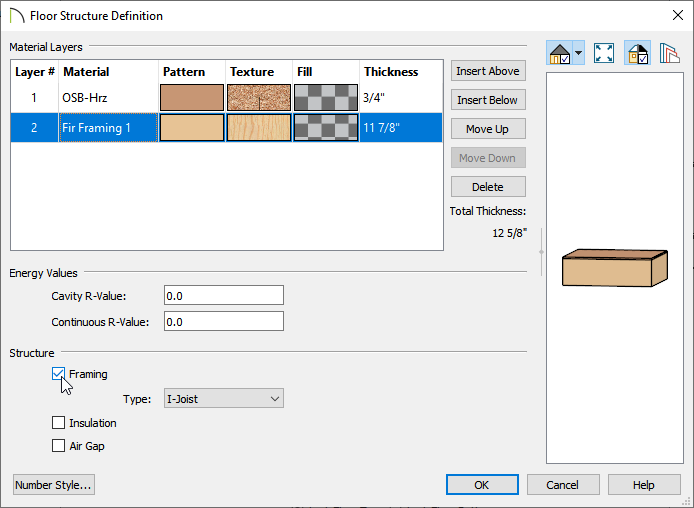
- Staying on the Structure panel, make sure that the Floor Under This Room box is checked, then click OK to close the dialog and confirm the changes.
- Now that you have verified that a Roof and Ceiling are set to be built, and the Floor and Ceiling Structure are specified correctly, select Build> Framing> Build Framing
 from the menu.
- In the Build Framing dialog, check the Build Floor/Ceiling Framing boxes for each floor (Foundation, 1st, 2nd, etc.) that you would like to generate framing for, then click OK to rebuild the selected framing types.
Do note that in order to create the floor framing for the 1st floor, a Foundation must be present.
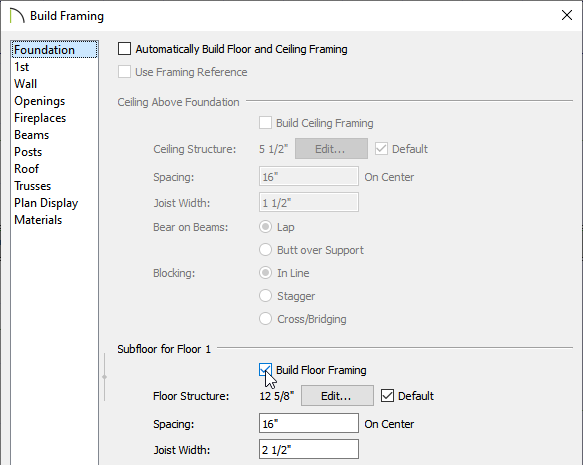
You can also check the box for Automatically Build Floor and Ceiling Framing for each floor so that framing will be regenerated automatically anytime a change is made to the model.

 edit button.


 from the menu.