The information in this article applies to:

QUESTION
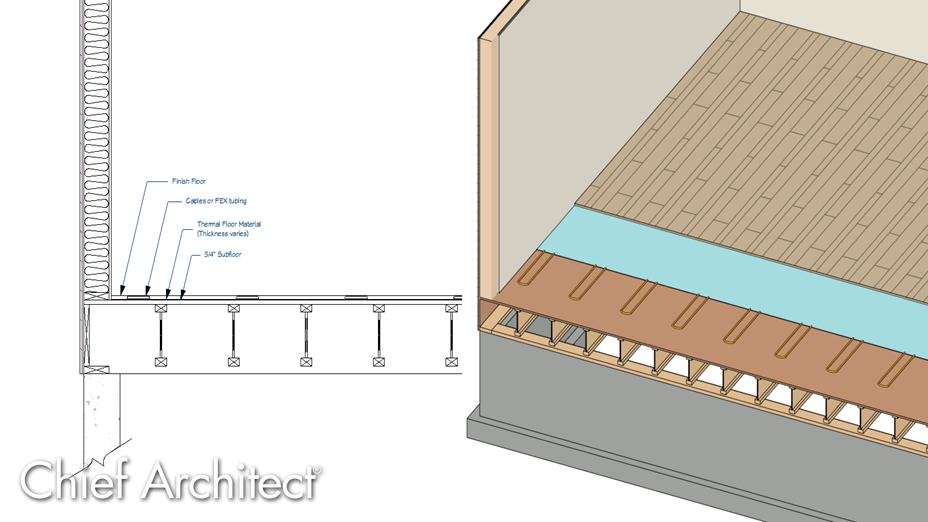
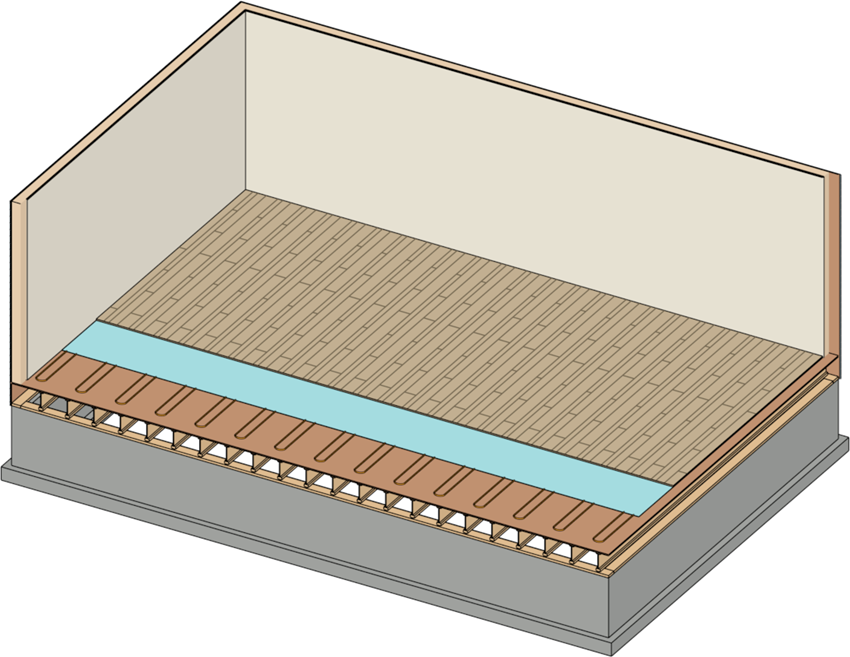
I need to create an isometric cutaway view of my floor system with radiant heating. How can I create this in Chief Architect?

![]()
![]()
ANSWER
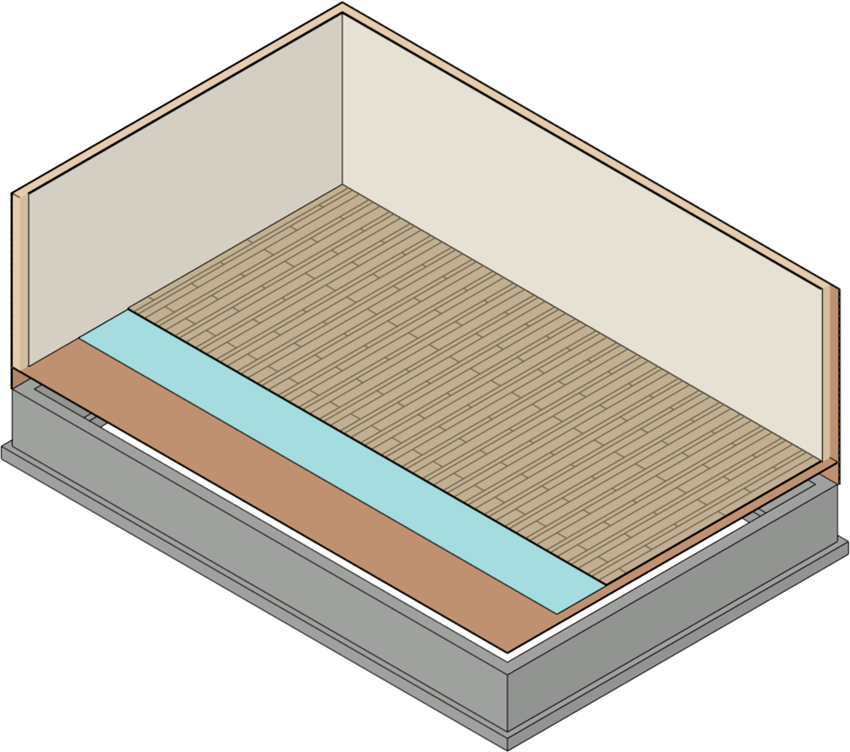
An isometric cutaway view of your floor system can be created by using floor material regions to show different floor structure layers.
We'll start in a new plan and generate some of the basics we'll need for the view.
To start your basic floor system cutaway plan
- Start a New Plan
 and draw in a four-walled enclosed room.
In this example, the structure is drawn 20' x 30'.

- Using the Select Objects
 tool, select the room and click the Open Object
  edit tool to open the Room Specification dialog.
- On the Moldings panel, uncheck the Use Floor/Room Default box, then click Delete to remove the molding from this room. Click OK to close the dialog.
- Select Build> Floor> Build Foundation
 .
.
For the purposes of this example, the settings remain at their defaults, so click OK then choose to Derive new Foundation plan from the 1st Floor plan, and click OK once more.
- Go to Tools> Floor/Reference Display> Up One Floor
 to return to Floor 1, then select 3D> Create Orthographic View> Orthographic Floor Overview
  .
.
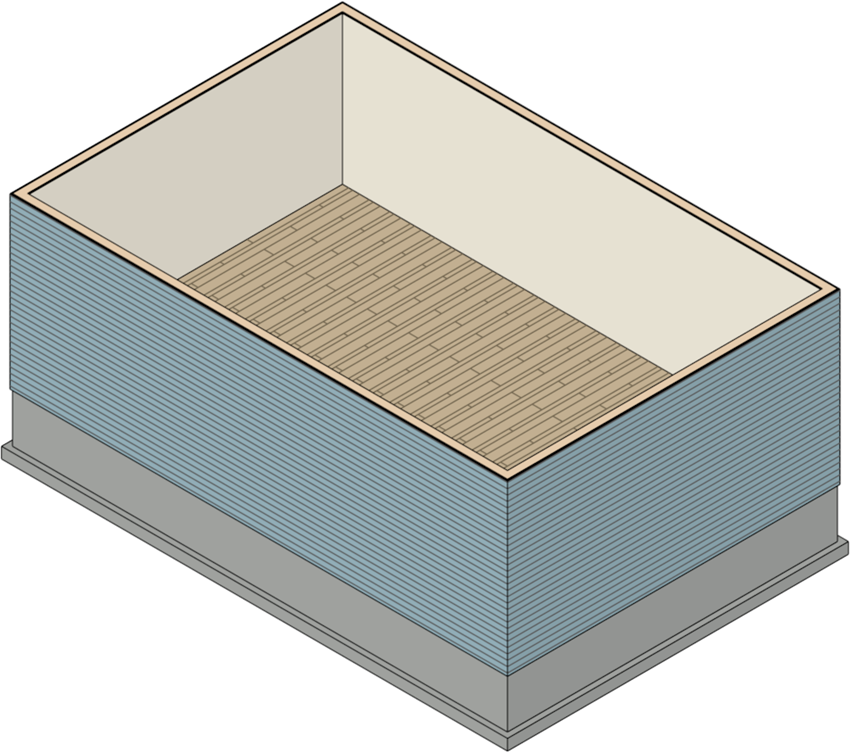
- Once the view has been created, select 3D> Isometric Views> Top Front Right View
 .
.

- Once you have your view orientated, navigate to 3D> Camera View Options> Hide Camera-Facing Exterior Walls
 so we can expose the floor system.
- Select Window> Tile Vertically
 so that we can see both the 2D floor plan and 3D isometric view side-by-side.
Now that you have an isometric view tiled with a floor plan view, activate the floor plan view.
Creating different floor finishes using the Floor Material Region tool
In our example, our floor finish is composed of 3/4" Maple 3-4-5" Plank Blonde, 1/8" Foam Underlayment, and we also have a 3/4" layer of OSB in our floor structure. These are the layers that we will be mimicking with the Floor Material Region.
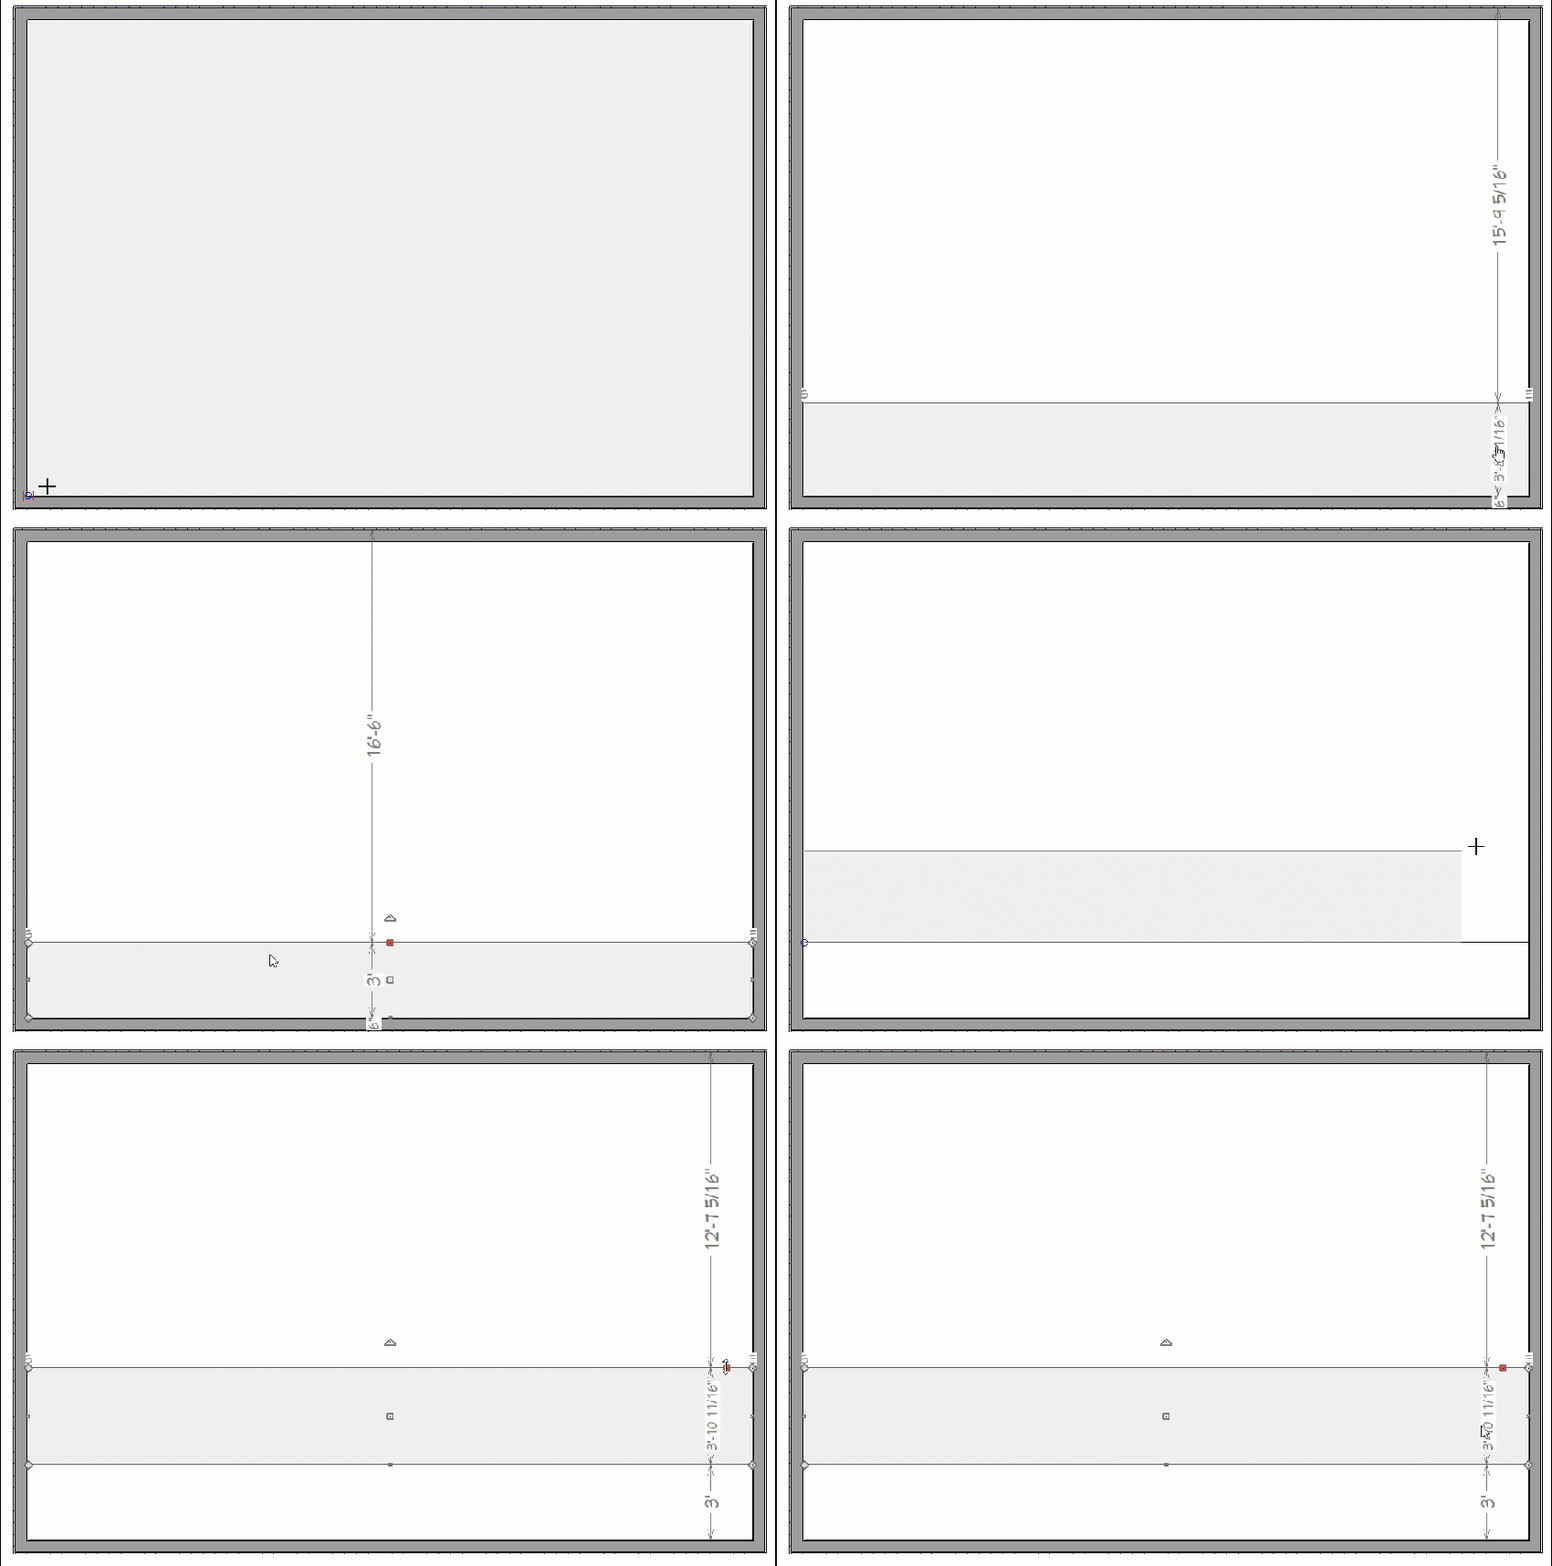
- To draw the floor material regions, navigate to Build> Floor> Floor Material Region
 , then click and drag to create a material region.
In this example we will make two 36" wide regions.
- Create the first region from the edge of the wall to your desired size.
- Create the second region from the edge of the first region to your desired size.

- Using Select Objects
 tool, select the material region that is going to show the OSB, then click on the Open Object
  edit tool to display the Material Region Specification dialog.
- On the Structure panel, click the Edit button next to Material Layers.
- Select Layer 2 and click Delete.
- Select Layer 1 and click Delete.
- Click OK.
- Ensure that the box for Cut Finish Layers of Parent Object is checked.
With no layer specified, the Material Region will cut through the existing floor finish, showing the OSB.
- Click OK again in the Material Region Specification dialog to apply this change, and observe the result in your tiled 3D view.
- Using the Select Objects
 tool, select the material region that is going to show your foam underlayment, then click on the Open Object
  edit tool to display the Material Region Specification dialog.
- On the Structure panel, click the Edit button next to your Material Layers.
- Select Layer 2 and click Delete.
- Select Layer 1 and change its Material from the default to Foam Underlayment.
- Adjust the Thickness to be 1/8".
- Click OK.
- Ensure that the box for Cut Finish Layers of Parent Object is checked.
- Click OK again in the Material Region Specification dialog to apply this change, and observe the result in your tiled 3D view.
In the 3D view, you may want to Zoom In  on the area of the room to see this area more clearly.

Now that you've created your rooms and deleted each of the Floor Finish options for your cutaway, you are ready to create molding polylines to model the radiant tubing.
To create molding polylines for radiant floor tubing
- In your floor plan view, select Build> Trim> Molding Line
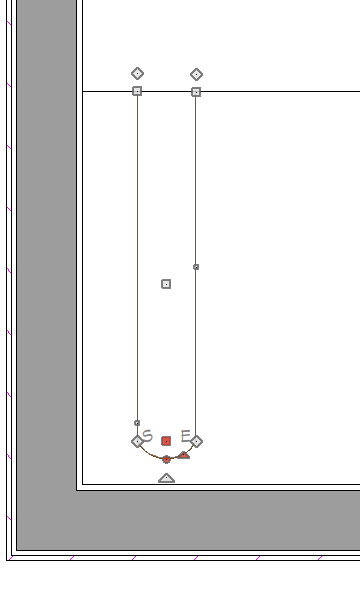
 , then click and drag to create a molding polyline the shape of your radiant tubing.
Start with a squared off U shape and then use the Change Line/Arc  edit tool on the flat bottom segment to curve that line.

- Select the newly created molding polyline and click on the Open Object
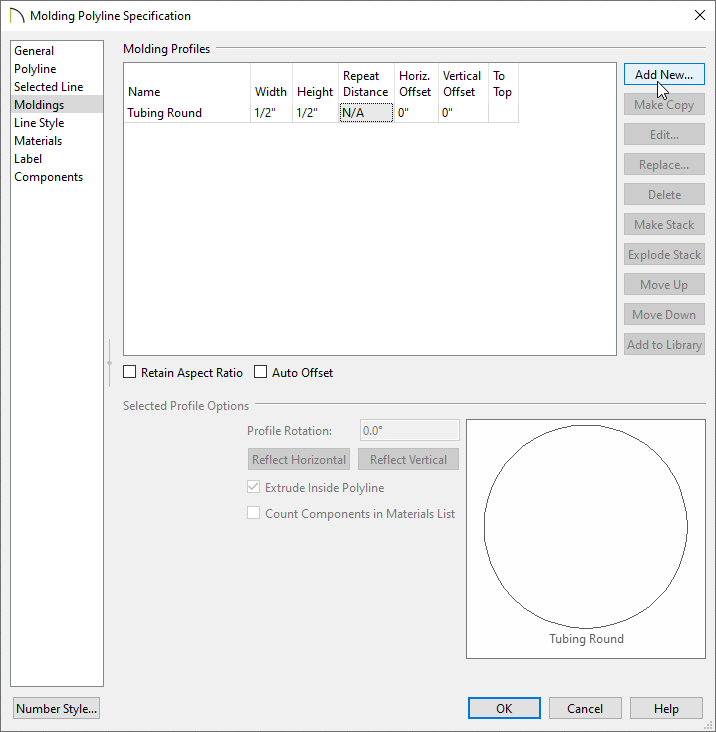
 edit tool to display the Molding Polyline Specification dialog.
- On the Moldings panel, click the Add New button to display the Select Library Object dialog, navigate to an appropriate molding for your tubing, then click OK.
In this example, the Tubing Round molding is used, with the Height and Width both set to 1/2".

- On the General panel, set the Molding Polyline Height to 1/4".
- On the Materials panel, choose an appropriate material for the tubing.
For the purposes of this example, a solid orange color is used.
- Click OK when you have finished making changes in this dialog.
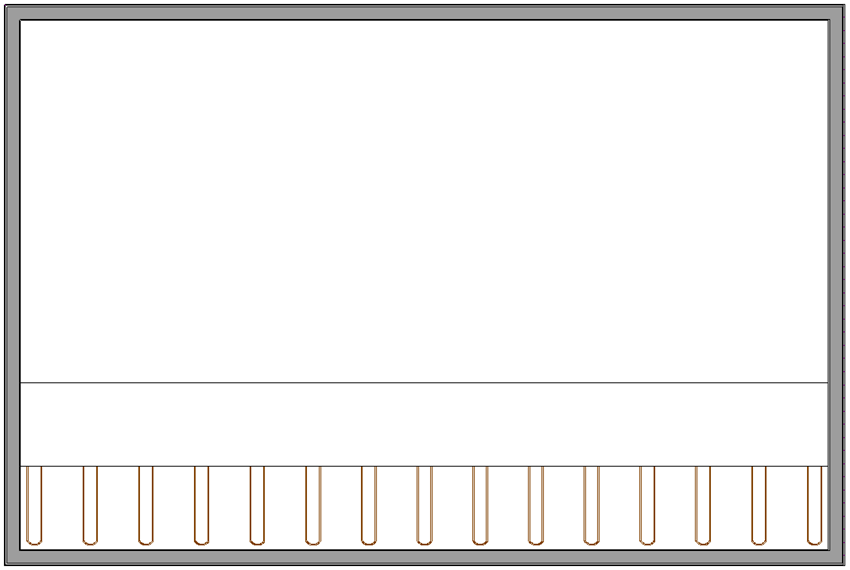
- With the molding polyline still selected, click on the Multiple Copy
 edit tool, then the Multiple Copy Interval
  edit tool.
- In the Multiple Copy dialog, select Offset Between Copies When Dragging and set the spacing interval for General Objects.
In this example 24" is used.
- Click and drag horizontally to create several evenly spaced copies of this molding polyline across the room.

Now that you have the basic cutaway created, it is time to generate and display the floor framing.
To build and display floor framing
- Activate the 3D camera view, then select Build> Framing> Build Framing
 .
.
- On the Foundation panel, under Subfloor for Floor 1, check the box for Build Floor Framing and click OK.
- Select Yes when prompted to display the Framing layers in this view.
- Remaining in the 3D camera view, select Tools> Layer Settings> Display Options
 .
.
- In the Layer Display Options dialog that opens, scroll to the "Framing, Rim Joists" layer, click in the Disp column for that layer to remove the checkmark, then click OK to turn off the display of this layer and reveal the floor joists.

This same process can be used to create other types of 3D isometric views, such as for plumbing and HVAC.

