The information in this article applies to:

QUESTION
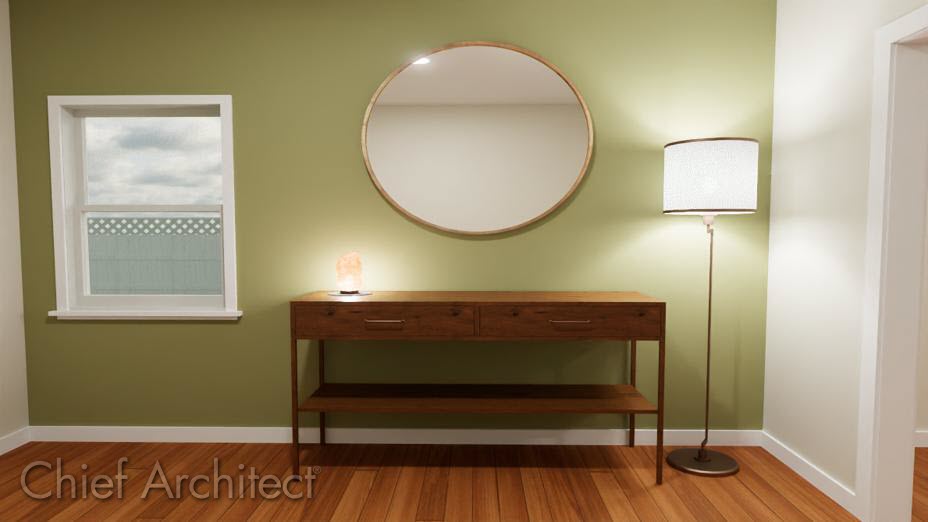
I need a console table for my design, but I'm not seeing one that matches my design in the library browser. Is there any way to create a custom table in Chief Architect?
ANSWER
The Base Cabinet tool can be used to create a variety of different kinds of objects, including console tables. Furthermore you can change the drawer style, the layout of the drawers, the drawer hardware, and the materials of the table.
To prepare your base cabinet to act as a console table
- To first place the cabinet, go to Build> Cabinet> Base Cabinet
 from the menu, then click in the plan to place your cabinet.
- Using the Select Objects
 tool select your cabinet and use the Open Object
  edit tool to open its specification.
- In the Base Cabinet Specification, on the General panel, you can specify the Width, Depth, and Height of the console table.
In this example, a Width of 60", a Height of 36", and a Depth of 18" is used.
- Remaining on the General panel, uncheck the checkbox for Countertop and the checkbox for Toe Kick.
- On the Box Construction panel, set the Top to Has Top and set the Bottom to No Bottom.
- Remaining on the Box Construction panel, set the Door/Drawer Overlay to Inset
- On the Front/Sides/Back panel, you will customize the layout of your console table. If you'd like to create a table like the one shown above, follow the steps listed below:
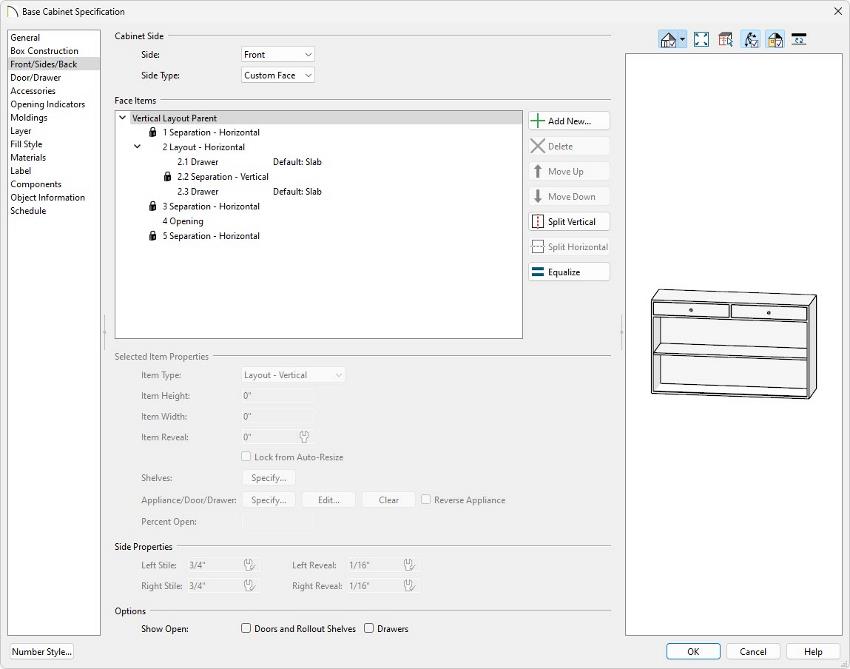
- In the Face Items list, select the 2 Drawer face item and click the Split Vertical button to split it into two.
- Select the 2 Layout - Horizontal face item and set the Item Height to set the height of your drawers.
In this example, a value of 6" is specified.
- Select the 4 Door - Auto Right face item and change its' Item Type to Opening.
- Select the 5 Separation - Horizontal face item and click the Delete button to remove the bottom edge.
For more information on customizing cabinet fronts, please see the Related Articles at the bottom of this article.
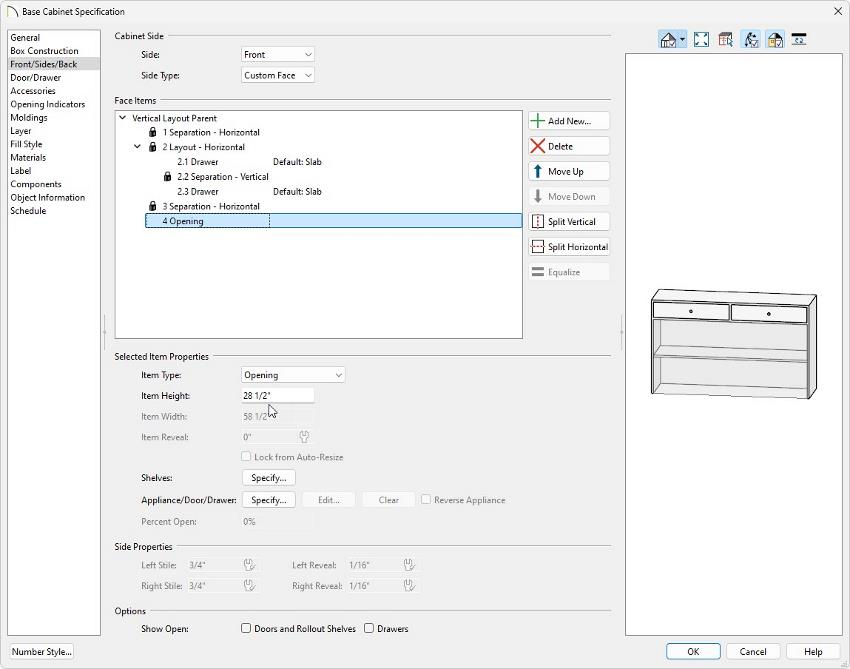
- Select the 4 Opening face item and take note of its' Item Height.
In this example, an Item Height of of 28 1/2" is specified.
To modify the shelving below the drawers
- On the Front/Sides/Back panel, select the 4 Opening face item and click the Specify button next to Shelves.
- In the Cabinet Shelf Specification that displays, set your Shelf Management to Manual.
- Underneath the Manual Shelf Specification section:
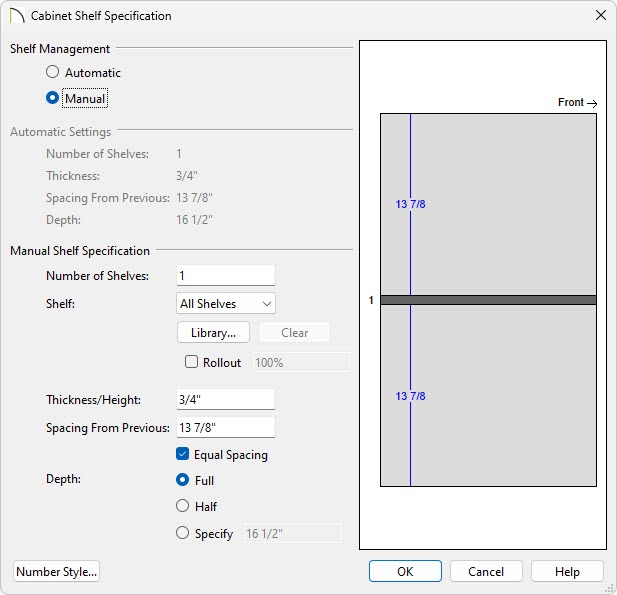
- Set your Number of Shelves.
- To change the shelf style, click on the Library button, and browse the library for a suitable shelf style.
- Set the Thickness/Height of your shelves
- Select Full, Half or Specify the shelf Depth.
- Adjust the Spacing From Previous to move the shelf within the opening.
- Once all desired changes have been made, click OK.
To adjust the sides and back of the cabinet
- On the Front/Sides/Back panel, change the Side to Back, and change the Side Type to Custom Face.
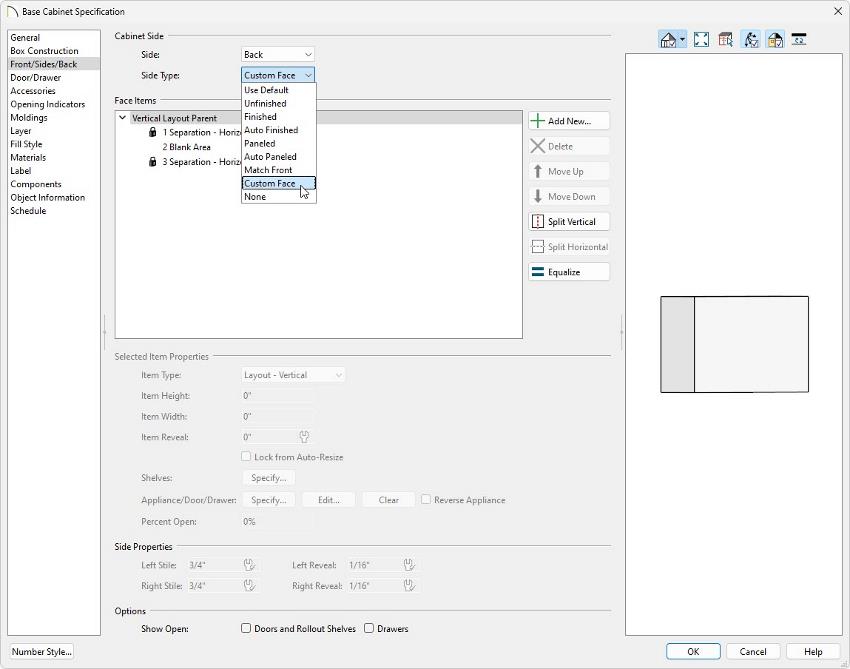
- In the Face Items list, select the 2 Blank Area face item and click the Split Horizontal button to split it into two.
- You will now have a 2 Blank Area face item and a 4 Blank Area face item. Select the lower 4 Blank Area face item and change its Item Type to an Opening.
- Select the 4 Opening face item and set its Item Height to the same as the opening on the front of the cabinet.
In this example, an Item Height of 28 1/2" is specified.
- Select the 5 Separation - Horizontal face item, and click the Delete button.
- Change your Side to Left/Right, then repeat Steps 1 - 5.
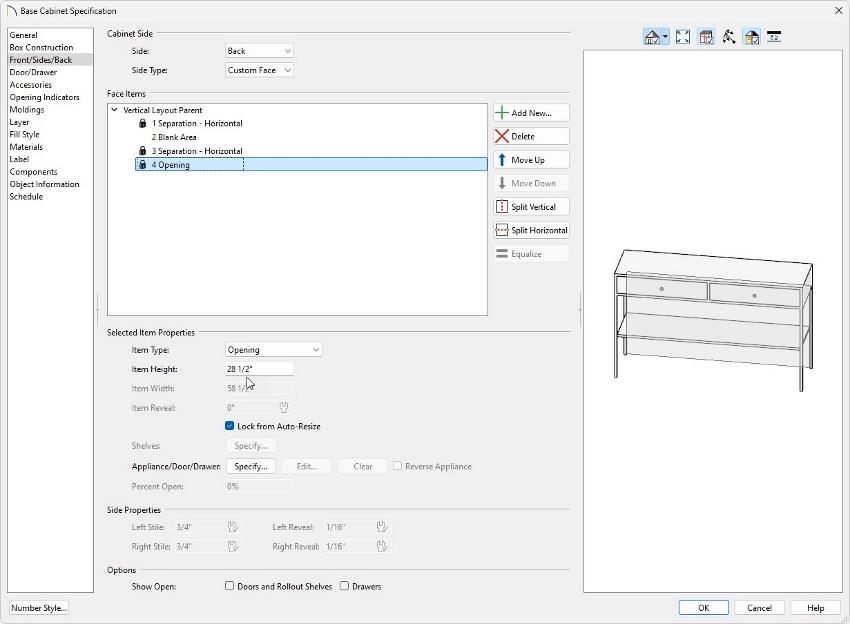
Once you have designed your cabinet, you can save it to your User Catalog for future use. Please see the Related Articles for more information.
Although the cabinet now appears like a table, it still has special behaviors specific to cabinets. To properly use this as a table, you will want to make it into an Architectural Block.


