QUESTION
How do I create an energy heel truss?

ANSWER
For energy efficiency, some areas recommend an energy heel, or raised heel, so that there is not a cold spot in the intersection where the roof meets the wall. An energy heel raises the roof, and allows for more insulation to reach the outside wall.
In this article, we will build build a basic gable roof over a 20' x 30' structure, then generate energy heel trusses.
To build the structure and roof
- Using the Select Objects
 tool, select the left and right walls, which will be gable walls, then click the Open Object
  edit button.
As mentioned above, we will be using a simple 20' x 30' rectangular structure for this example. The left and right walls are 20' in length.
- On the Roof panel of the Wall Specification dialog that opens, choose the Full Gable Wall option, then click OK.

- Select Build> Roof> Build Roof
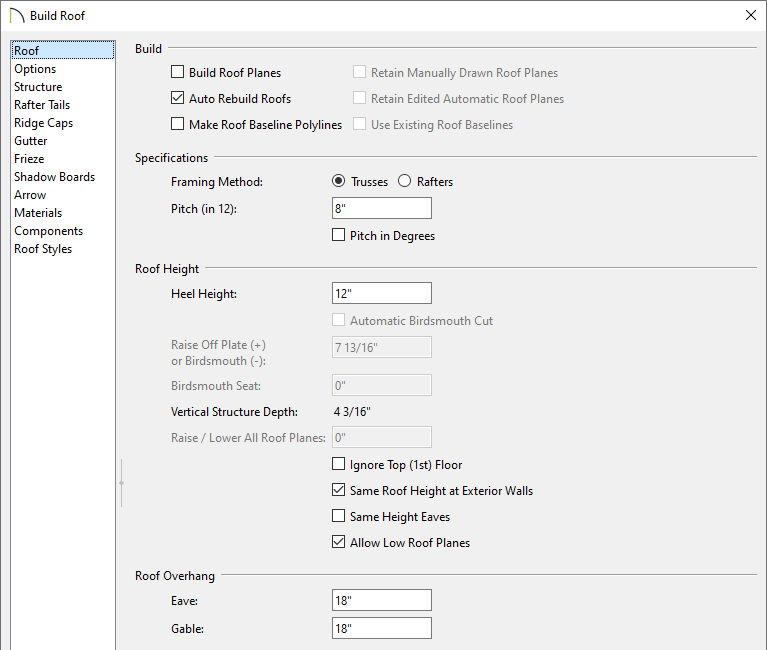
 from the menu, and on the Roof panel of the Build Roof dialog that displays:
-
Check either the Build Roof Planes or Auto Rebuild Roofs box.
-
Select the Trusses Framing Method.
In X14 and prior versions, check Trusses (no Birdsmouth) instead.
-
Specify your desired Pitch (in 12) and Roof Overhang values.
In this example, the default 8" in 12" pitch is specified with the default 18" overhangs.
-
Set the Heel Height to your liking.
In X14 and prior versions, uncheck Automatic Birdsmouth Cut, then specify the Raise Off Plate (+) or Birdsmouth (-) value to the height you want the energy heel.
In this example, the value of 12" is used.
- Click OK to close the dialog and generate the roof planes based on these settings.
To create energy heel trusses automatically*
*Applies to Chief Architect Premier X15, Home Designer Pro 2024, and newer versions.
- Click Build> Framing> Build Framing
 from the menu.
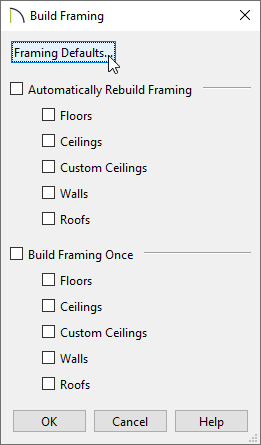
- In the Build Framing dialog that appears, click on the Framing Defaults button.
In X15 and Home Designer 2024, skip this step and proceed to Step 3.
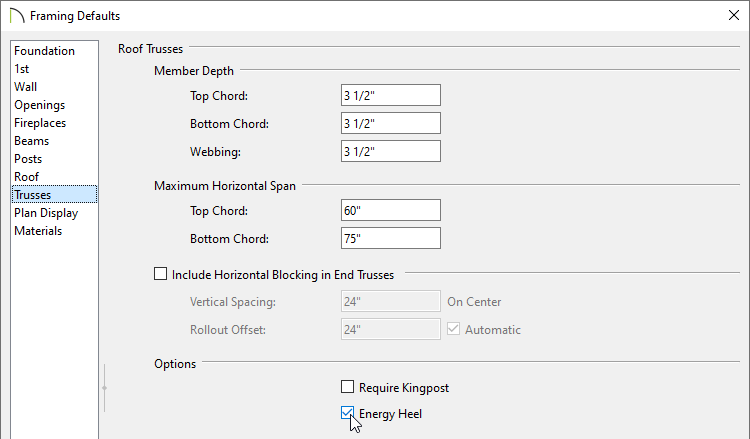
- Access both the Roof and Trusses panels in the dialog that appears, and verify that the settings are set to your liking.
In this example, the default Rafter/Truss Spacing value of 24" is used, the Ridge box is unchecked, and the Energy Heel box is checked.
- Once your roof framing settings are setup to your liking, click OK, check the appropriate Roofs box in the Build Framing dialog, then click OK.
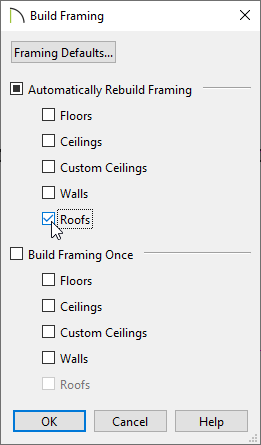
In X15 and Home Designer Pro 2024, check the Build Roof Framing or Automatically Build Roof Framing box located on the Roof panel of the Build Framing dialog instead, then click OK.
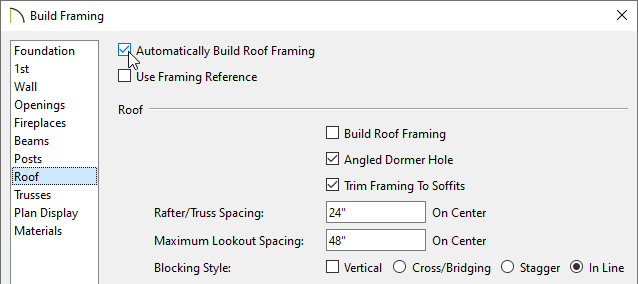
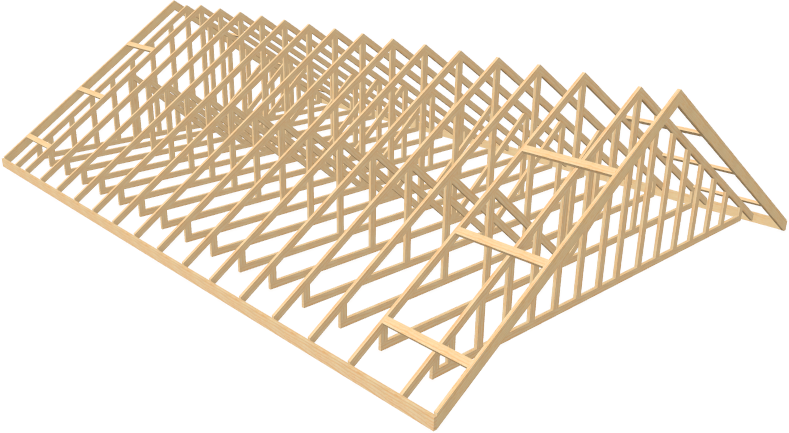
Automatic trusses, along with any other automatic framing components, such as blocking and fascia boards, will be generated.
You may be prompted to choose whether or not to display roof framing layers in the active view. Whichever choice you choose will not affect the generation of the framing components.
The trusses located on each end of the structure will be reduced gable end trusses. If you don't want these types of trusses to be built automatically, open the two gable walls up to specification, select the Roof panel, and uncheck the "Include Automatic End Truss Above" box. Once you regenerate the roof framing, end trusses will no longer be built.
- Create a Perspective Framing Overview
 to see the results.

To create energy heel trusses manually
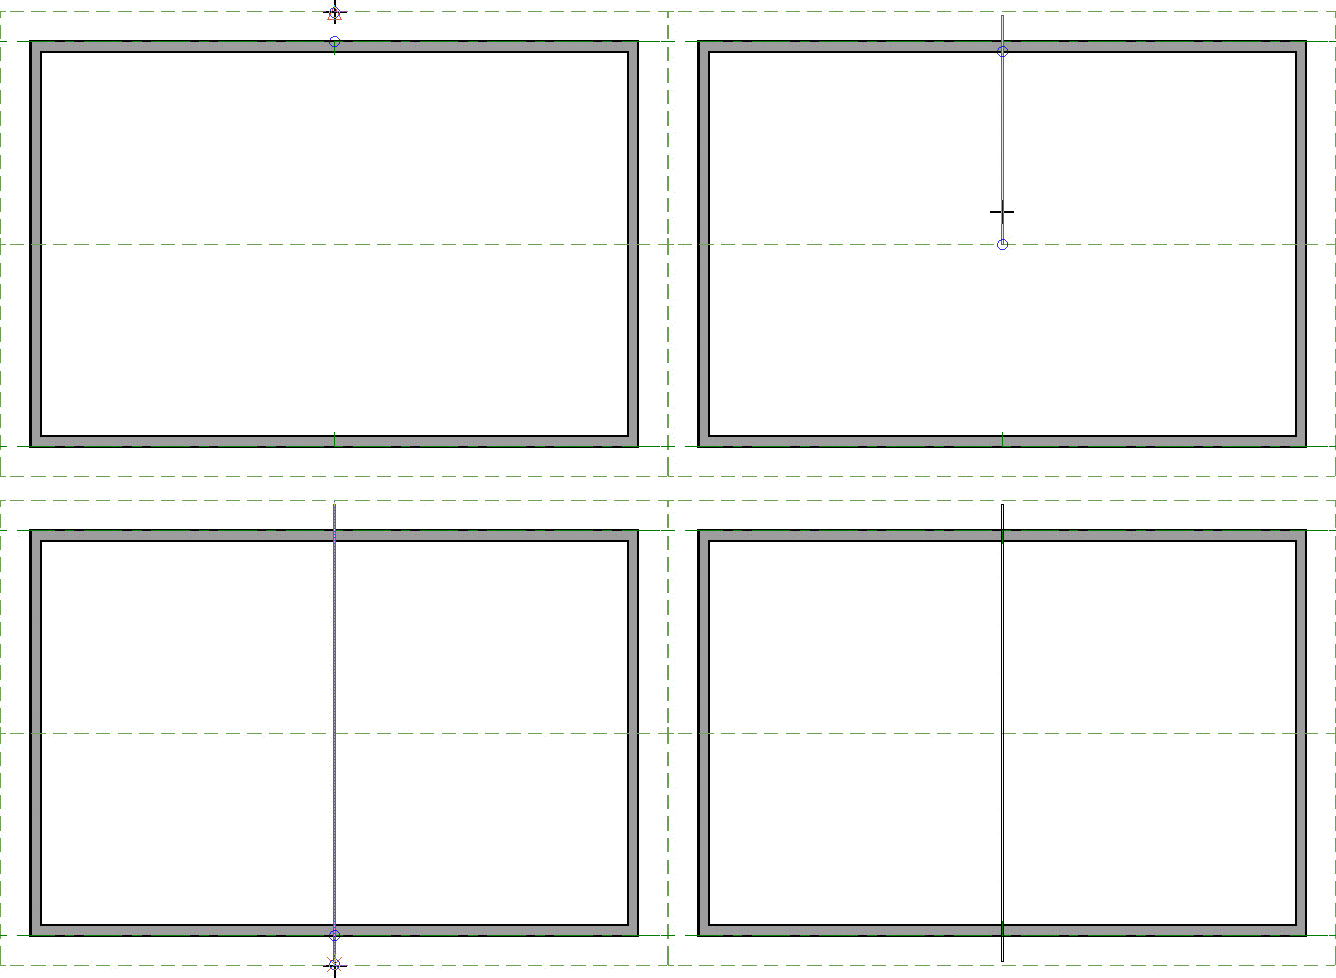
- Click Build> Framing> Roof Truss
 from the menu, then click and drag to draw a roof truss.
- Using the Select Objects
 tool, select the roof truss, then click the Open Object
  edit button.
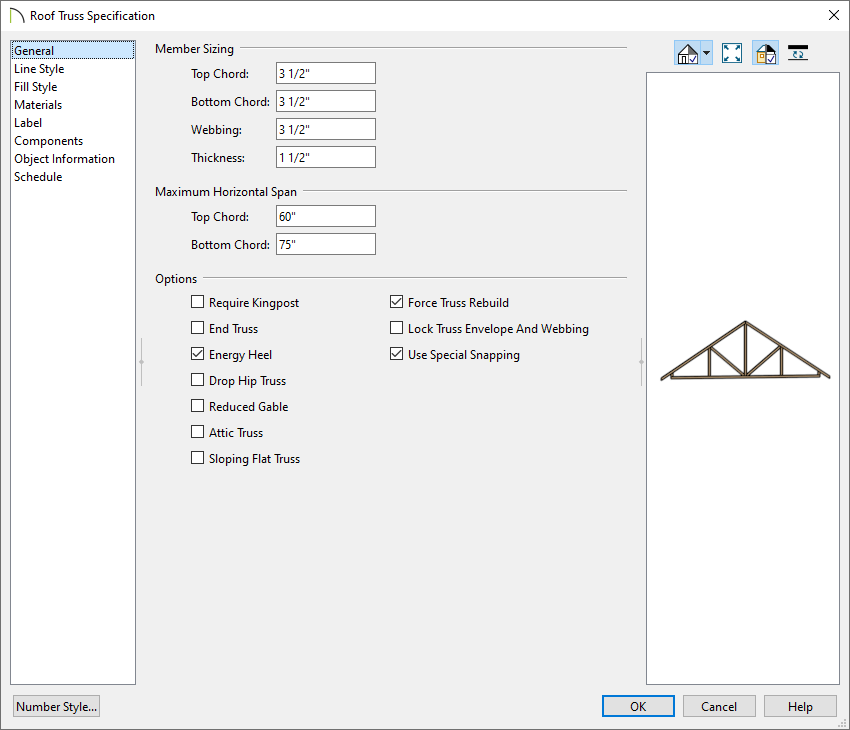
- On the General panel of the Roof Truss Specification dialog, check Energy Heel if it's not already checked, check Force Truss Rebuild, then click OK.
- Next, Move
 the truss to the edge of your structure.
- With the truss still selected click on the Multiple Copy
 edit tool.
Multiple Copy is not available in Home Designer Pro; instead, use the Transform/Replicate  edit tool. As an example, if you wanted to create 6 copies all separated a certain distance from each other, you would check the Copy box, set the Number of Copies to 6, then check the Move box and set the X Delta to be 24". Negative values can also be set for each of the Deltas if needed.
- Click on the Multiple Copy Interval
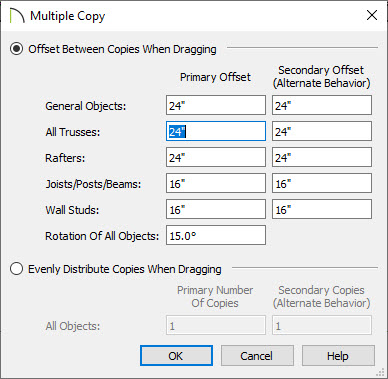
 edit button and verify that the All Trusses is set to the desired spacing and click OK.
- Move your cursor over the Move
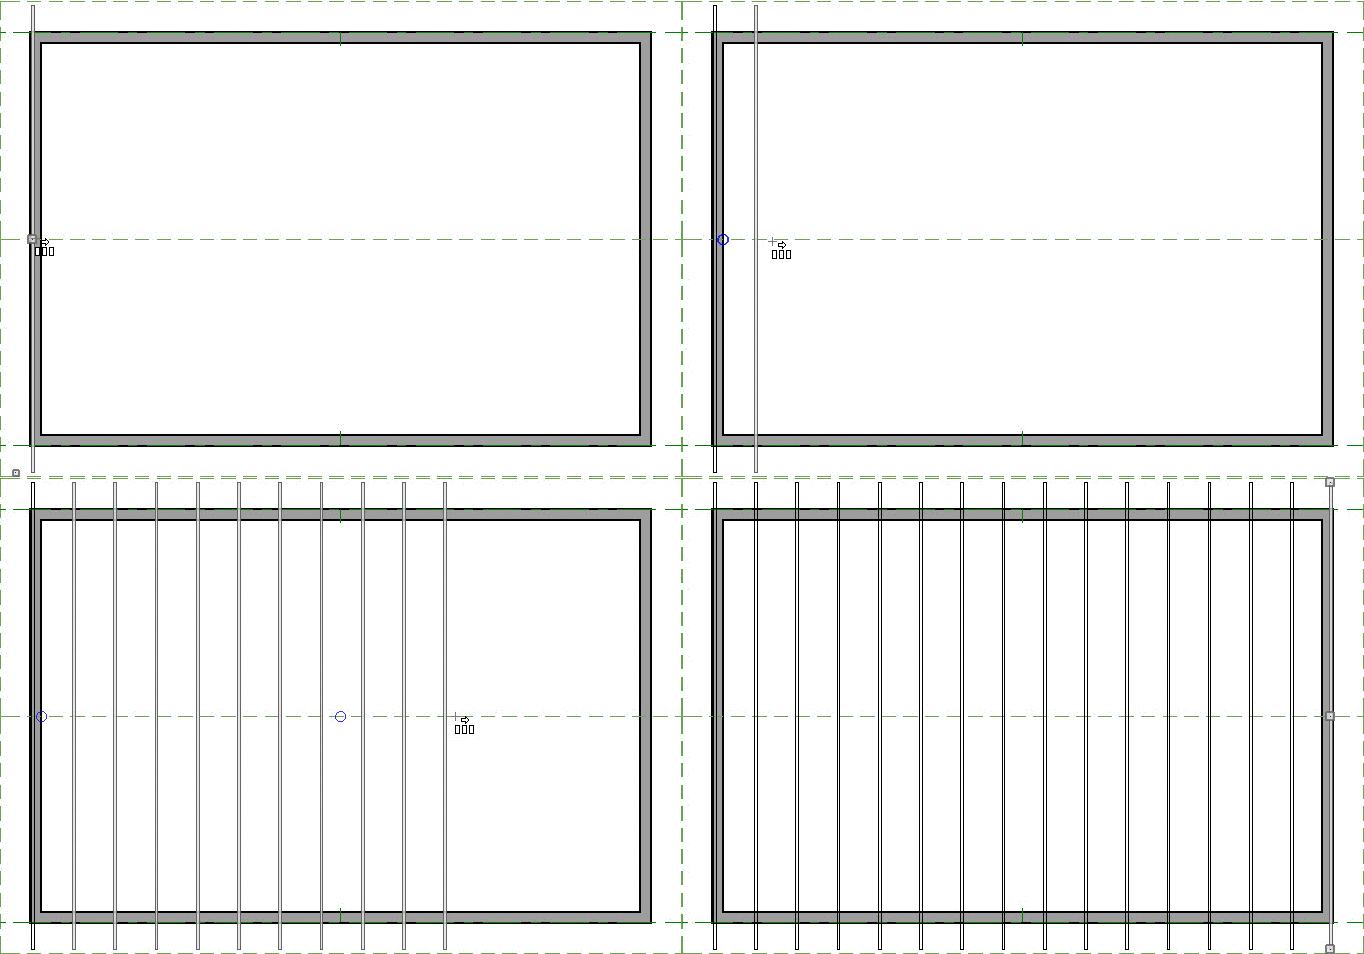
 edit handle of the truss. You will notice that your cursor changes to the Multiple Copy
  cursor.
- Click and drag across your plan to place trusses at regular intervals.
- Create a Perspective Framing Overview
 to see the results.
Now, additional framing components, such as lookouts and fascia boards, can be generated automatically using the Build Framing dialog.


 from the menu, then click and drag to draw a roof truss.
 tool, select the roof truss, then click the Open Object
  edit button.
 edit tool.
 edit button and verify that the All Trusses is set to the desired spacing and click OK.
